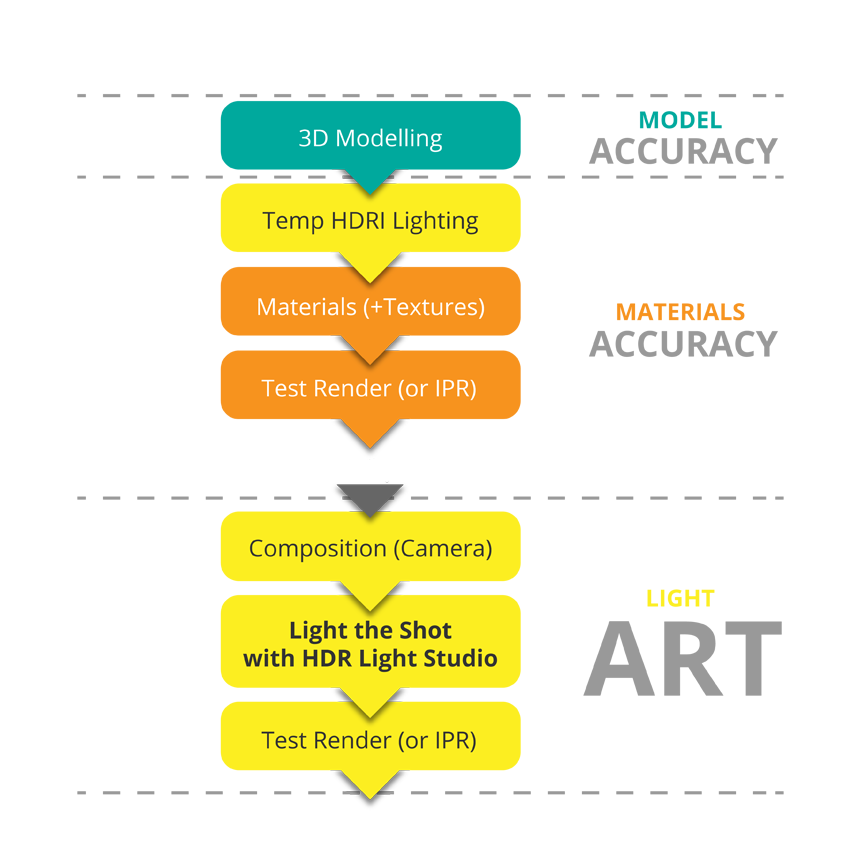
To make a realistic, high quality CGI image, you need everything to be right; a perfect 3D model with realistic shaders/materials that react to light (illuminations and reflections) correctly, with render settings that balance sensible render times with a high image quality. Only when all of those ingredients are working well you can start lighting a shot to a high standard using HDR Light Studio.
Lightmap is often sent 3D scenes by potential customers and asked to light them to demonstrate HDR Light Studio.
The first thing we do when opening a customer’s scene is to use an exterior HDRI map and load this to light the scene. If you surround a 3D scene with a realistic photographically shot exterior HDRI environment, this is a fantastic way to check the rendering and see how the model and shaders are reacting to the lighting and reflections. If the 3D scene looks photo-realistic and you are convinced by the materials, they look believable, this is a great start. We don’t expect the model to look dynamic and beautiful at this stage – the lighting is not being controlled and designed yet. But if the model sits well within that exterior environment and is believable, photographic, then we know that when we start to light the shot using HDR Light Studio then we are going to get great results.
But if the model doesn’t look believable, if the materials look strange and somehow not as intended, fake, cartoony, dead, lifeless – then we have a big problem. There is literally no point in proceeding. Whatever time you spend lighting this shot, the light will not react properly with the shaders and you will not have proper control over the lighting – period. You will waste hours and hours, and get nowhere. The image will never look good. HDR Light Studio is powerful, but can never rescue a scene with shaders that are not responding correctly to light.


