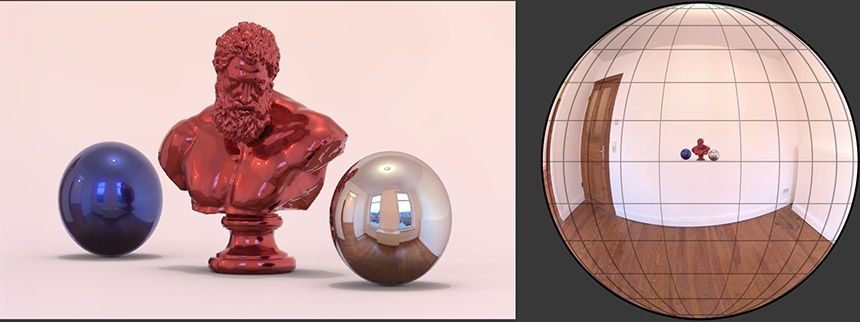
How does HDRI Lighting Work?

HDRI Lighting is technically called 'image-based lighting'. Image-based lighting works by applying a high dynamic range image map (HDRI map) onto an environment light in 3D software. The environment light surrounds the 3D scene and provides HDR illumination, HDR reflections, and a HDR background for the render.
What is an Environment Light?

An environment light can be thought of as a sphere that surrounds the 3D scene with a HDRI map mapped onto its inside surface. The environment light surface provides illumination directed inwards towards the center of the sphere. The environment light can also be visible in the 3D scene, providing HDR reflections and background to the shot.
An environment light type has a variety of names depending on the 3D software/renderer you are using. Here are some naming examples for popular renderers:
- Arnold Render = Skydome Light
- Blender = World
- Corona Render = Environment
- V-Ray Render, Redshift Render = Dome Light
- RenderMan = PxrStdEnvMapLight
We learn more about Environment Lights later on in this article.
Reality Measured

Most HDRI maps are captured photographically at a real location. Think of the HDRI map not as a photographic image, but as an accurate measurement of the brightness and color of the light coming from all directions around the camera. Each pixel on the flat HDR image stores a color and brightness value for a specific direction and this will be mapped onto the environment lights surface.
What is HDRI lighting used for?
Easy Photo-realism
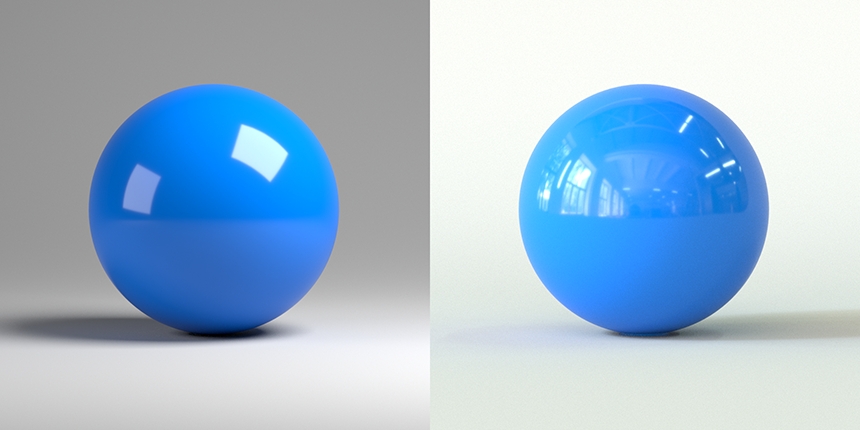
HDRI lighting is widely used by 3D artists to generate very realistic 3D renderings with the HDRI maps photo-realistic illumination and reflections interacting with the computer-generated objects in a 3D scene. Because an environment light is simple to use by applying a HDRI map - it's an easy way to improve the realism of your renders.
CG Integration
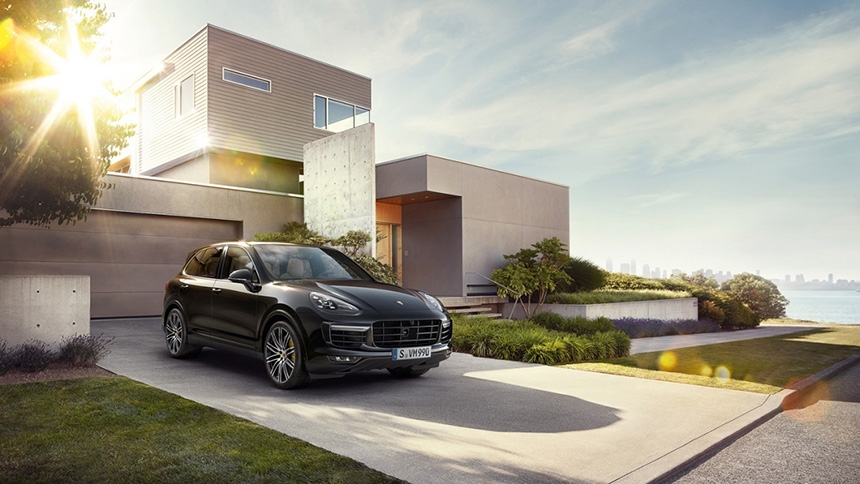
A key application for image-based lighting is integrating 3D rendered elements into a photographic background image or movie. This is done by generating a photographic HDRI map at the location being photographed or filmed, from the position where the CG object will be added to the scene. Once the CG object is lit with image-based lighting, it will convincingly appear to have been photographed at that real location and will integrate seamlessly when composited with the background image. The CG object will receive the same lighting and reflections as the rest of the real items seen in the back-plate image.
Easy Lighting Presets
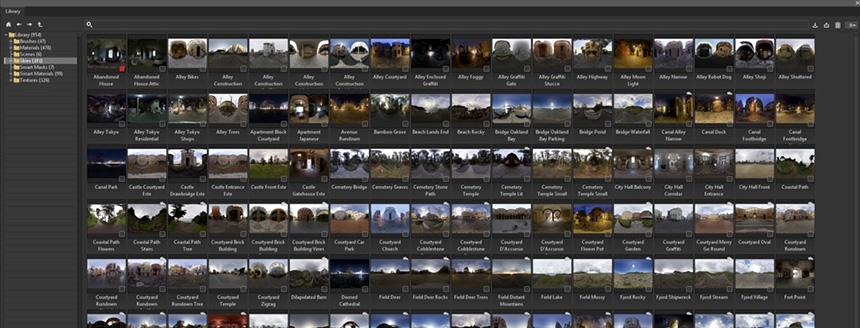
Often image-based lighting is simply used as an easy lighting method with a library of HDRI maps used as 'easy lighting presets'. Many HDRI maps are created photographically to capture a real-world location. That location can be outdoors, an interior, or even a studio lighting environment. The content represented in the HDRI map can be anything.
Many 3D applications ship with a small library of HDRI maps that can be applied to the scene for lighting. These are often a mix of outdoor, indoor and studio lighting. This range of HDRI maps gives a choice of light looks and provides instant realism without any need to design the lighting. You simply try out different HDRI maps until you like the effect of one.
Putting a 3D model into image-based lighting will automatically make it look good - much better than fake 3D lights. This approach is good enough for non-3D artists using CAD software, for example, who need an image to present a new design concept. They want lighting that is simple to use.
Studio Lighting

The HDRI map is just an image format and the content can be created in other ways, not just photographically.
Many Studio HDRI maps are created with a spherical camera in 3D software. This generates a HDRI map from the 3D scene. Some studio HDRI maps are made using photo editing software to paint/draw them. That's not ideal as photo editing software is not designed to do this.

However, HDR Light Studio is an application dedicated to the creation of HDRI maps for 3D lighting - especially Studio HDRI Maps. You could think of HDR Light Studio as a real-time design studio for HDR lighting.
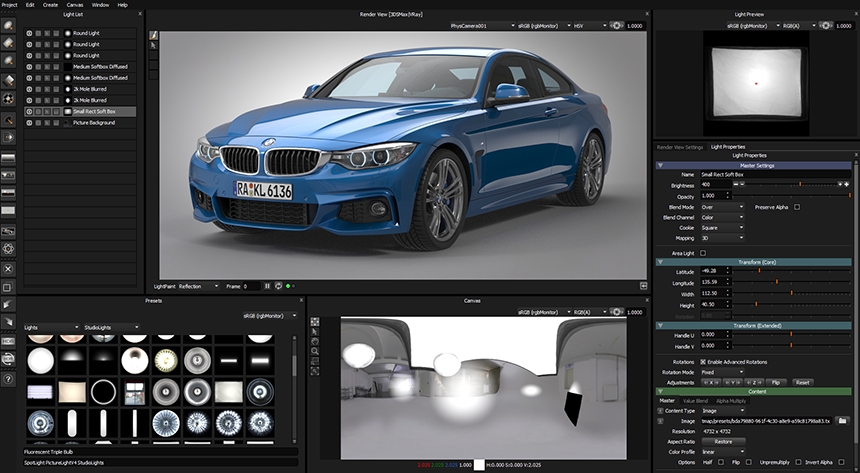
With HDR Light Studio, a live lighting design is shared in the HDRI map format with your 3D software. As the lighting design changes in HDR Light Studio, the lighting is updated in the 3D software. So the format of a HDRI map is being used as a dynamic way to design lighting your 3D scene. Rather than relying on a small library of generic HDRI maps, HDR Light Studio allows you to create your own custom HDRI map for every shot. This provides the perfect lighting tailored to the camera view, forms and materials of the objects being rendered.
Why use HDRI Lighting?
Fast to set up
Add an environment light to your 3D scene and apply a HDRI map. That's all it takes to add realistic lighting and reflections to your 3D render.
Easy to use
Environment lights require very few controls. The most useful are horizontal rotation and brightness - used to orient the lighting/shadows and change the overall brightness of the illumination/reflections.
Fast Render Times
Modern renderers (Arnold, V-Ray, Octane, Redshift, Corona, RenderMan, etc) are optimized to very efficiently render 3D scenes using image-based lighting. The rendering process requires calculating ray tracing intersections with the environment light. By focussing more effort on the bright areas of the HDRI map, a less noisy, higher quality render is achieved in far less time. This approach is called importance sampling or adaptive sampling.
No Need to Model An Environment
It takes a huge amount of work to model and apply materials and textures to your 3D models. So when you come to render your model, why spend a lot of time modeling a realistic environment for the objects to be located in? Using an environment light creates a perfect staging for your objects, giving them an instant location for your virtual photography session. With a shadow catcher floor, your objects will appear fully integrated with the HDRI environment.
Photoreal Results
3D renders lit by accurate, well-calibrated HDRI maps that interact with materials that have been created in a physically correct manner, will produce images that are indistinguishable from a photograph.
The only way to integrate CG into Back-plates
As we have already discussed, using image-based lighting is the only way to properly integrate a 3D rendered object convincingly into a background image. The lighting's brightness, colors and direction, and reflections will perfectly match with the other real objects in the back-plate photograph.
What are the limitations of image-based lighting?
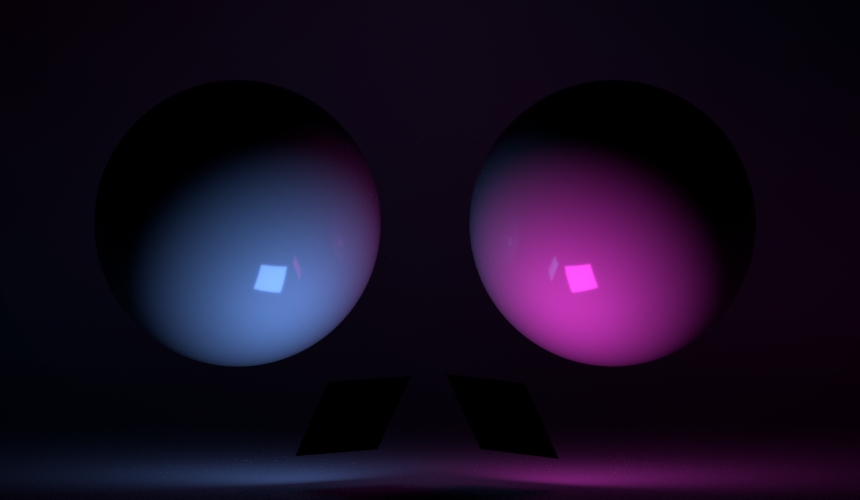
Lights can not be placed in 3D space
Lighting coming from the environment light can not be focussed/directed to a particular region of your 3D model. An environment light surrounds all of the objects in your 3D scene and will light and reflect in all surfaces. Only 3D light sources, like area lights, can be placed inside the 3D scene and be located to illuminate and be reflected in a specific area.
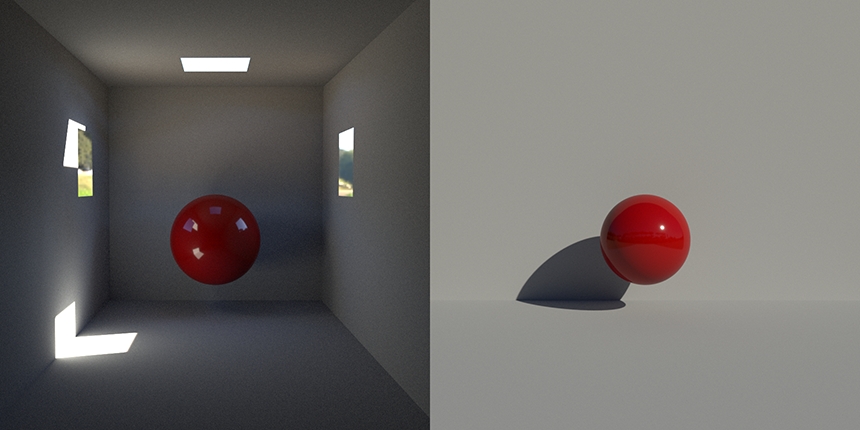
Scene can obscure the environment
Objects in the scene can obscure the environment light and limit its ability to light the subject of the shot. For example, if you are producing a render of an object inside an architectural interior. The light will only be able to come into the space through the windows from the environment light. That lighting may take too long to calculate to get a good smooth render, or just look bad as the light doesn't reach the subject. So environment lighting of objects works best when a lot of the environment light is seen directly by the subject.
So you've got this far in the article. If you are interested in using image-based lighting for your 3D scenes, the following deep dive into environment light features could be a useful primer for you.
Let's learn about Environment Lights in detail
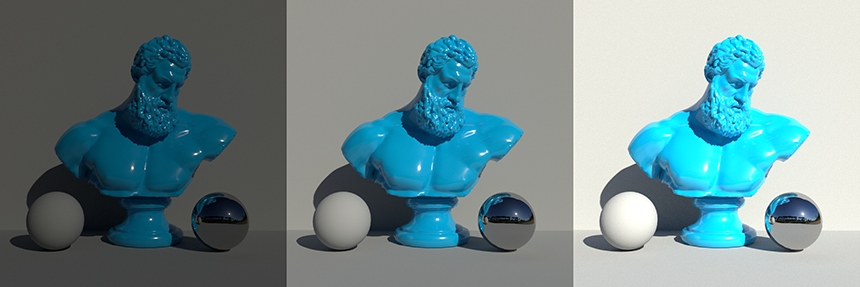
Common Controls for all Environment Lights
All 3D rendering software will provide settings to rotate the environment light. This enables the environment to be rotated horizontally relative to the 3D scene. You would do this to move the positioning of the lights, shadows and reflections - so they provide a pleasing effect on your 3D scene.
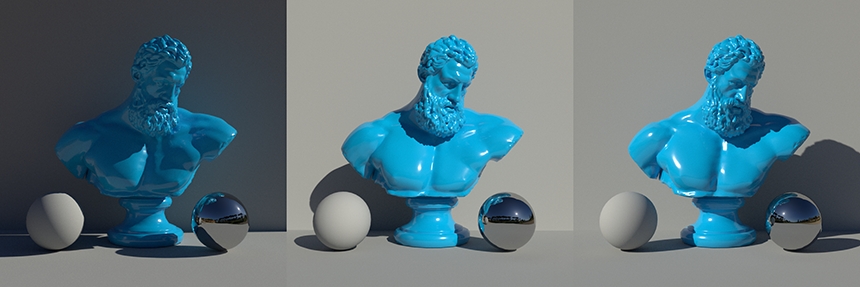
The brightness control may be called intensity. The intensity of lighting stored in each HDRI map varies. So once the HDRI map is loaded and rotated to a pleasing position, the brightness will need adjusting to provide the right exposure.
Contribution of the Environment Lights
By default in most renderers, the environment light will provide illumination, reflections and be visible in refractions and in the background of the shot.
Some renderers have settings to allow you to control how the environment light contributes to the scene, allowing you to turn off its contributions for illumination, reflections, refractions, and background.
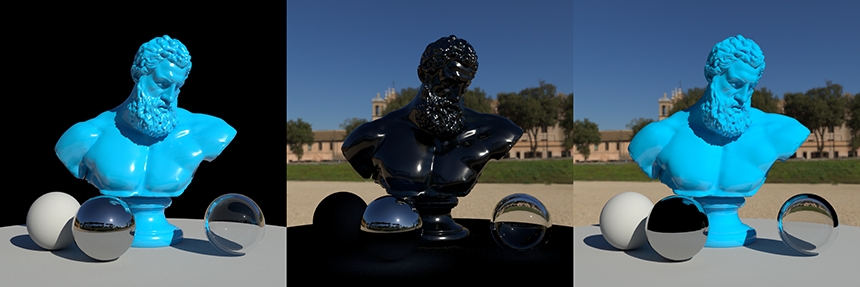
Why would you want to control this?
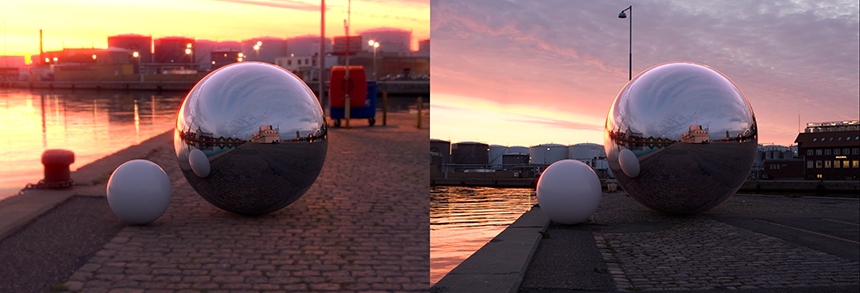
One example is if you have a high-quality back-plate photograph - that would be better to have in the background of the render. The section of the HDRI map you see in the background is only a small part of the map. So for the background HDRI to be a good resolution, you need an enormous resolution HDRI map, which is far higher resolution than needed for the reflections and lighting. So making the HDRI map invisible in the background would allow you to either include the backplate image as the background in the rendering, or to have a transparent background with an alpha, and composite the render over the top of the back-plate image afterward.

Another reason is you may want to use a different HDRI map for the background that has less distracting content. Many 3D renderers support multiple environment lights. So one environment can be used for illumination, reflections, and refractions. And another environment light can be used for the background.
Advanced Control over Environment Light Geometry
Some renderers treat the environment light as an infinitely large sphere with no size adjustment. Thereby treating all of the content on the HDRI map as far away from the 3D model. This works pretty well but is only an approximation. Certain situations can benefit from more control over the shape and size of the environment light to provide more accurate results.
In the video above, for example, see how the HDRI map is not providing a convincing background for the shot from certain angles. See how the scale of the car relative to the environment light looks OK in some camera positions, but way out of scale in other positions. See how the car floats in the air when looking side-on. If you don't have a back plate image, it would be nice to use the HDRI map as the background from any angle. This requires control over the size and shape of the environment light.
For example, Corona Render in 3DS Max has a dome light setting that changes the light from an infinite sphere to a hemisphere with a flat floor. A hemisphere is ideal for rendering cars, as they are generally sat on a flat(ish) road surface without any other objects too close.
You can set the size and position of the hemisphere and a camera height setting. The camera height setting moves the height of the origin of the spherical projection of the HDRI map onto the hemisphere surface. To be most accurate this should match the height the camera was at when the HDRI map was shot.
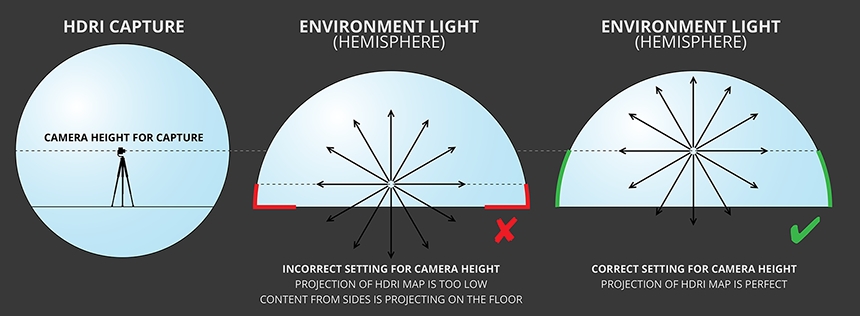
You can see in the example below the result of getting the camera height setting wrong. The content that should be at the sides of the environment light above the horizon will slip down onto the floor and become heavily distorted. If you have a reasonable camera height setting this will not happen.
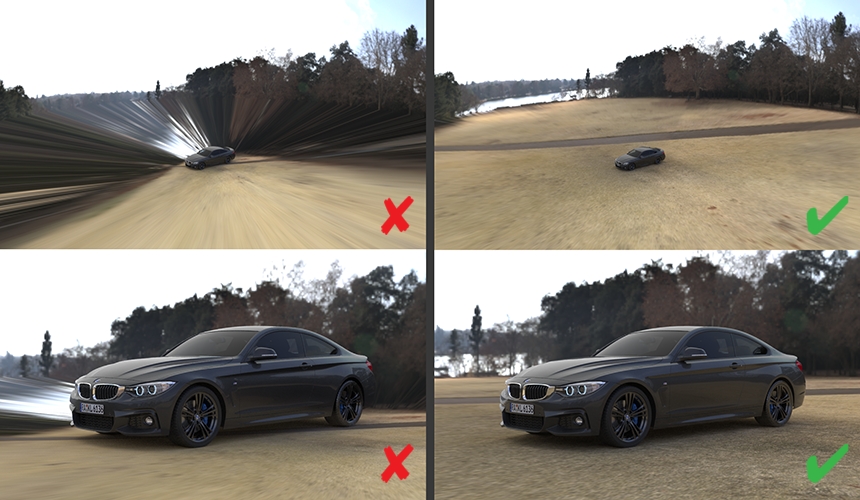
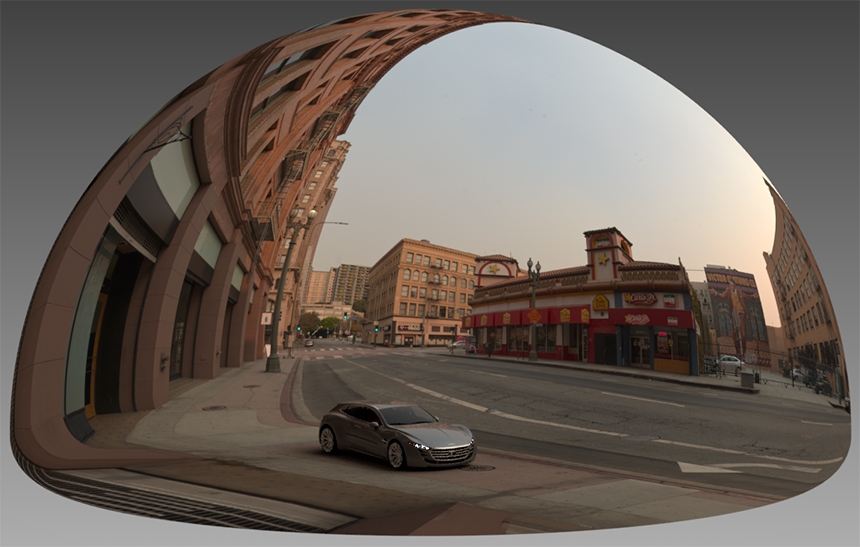
The hemisphere is not a perfect solution and there can be issues with distortion across the transition from the corner where the floor meets the sides of the hemisphere. Autodesk VRED uses a dome light with a radiused soft edge between the floor and sides that provides a soft transition - this helps with distortions.
A shadow catcher is geometry in the 3D scene that generates shadows being cast by the environment lighting. A shadow catcher is most commonly used as a floor shadow cast by the objects being rendered. This floor shadow is layered over the background and gives the illusion that the rendered object is either within the visible HDR environment or part of the back plate image. Without a floor shadow, the object will look like it's floating in space and will not be properly integrated into the background.
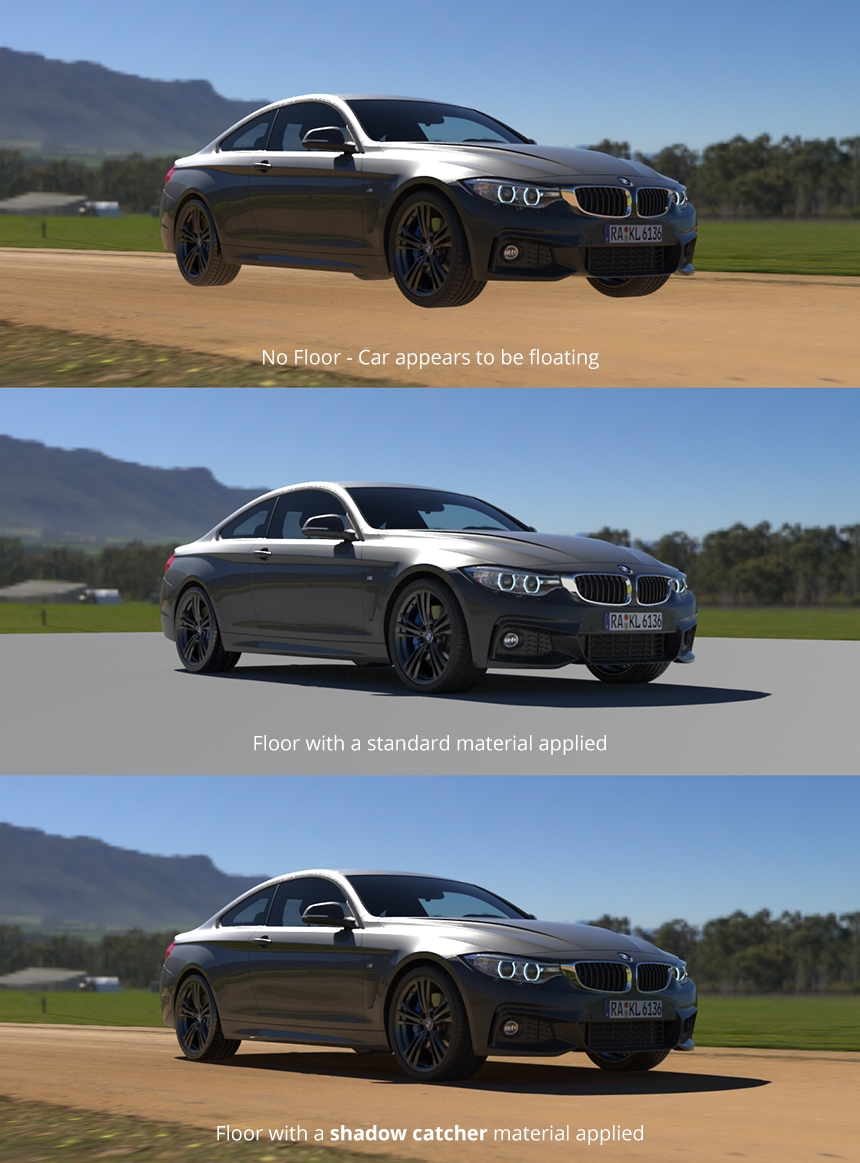
A shadow catcher is an essential ingredient for many shots lit with HDRI lighting. A shadow catcher is sometimes called a floor shadow or matte shadow and how this is created differs between different 3D software/renderers. You will need to consult the documentation for your renderer to learn how to set this up. For most 3D software it is set up by creating a floor plane and assigning a special shadow-catching material to this surface. For something so simple, it can be quite tricky to set up the first time.
What's the easiest way to do HDRI lighting?
As you have learned above, image-based lighting is easy to use in virtually all 3D software. Just make an environment light, assign a HDRI map, and then rotate and adjust the brightness until it looks good.
But if we were to ask the question... What is the easiest way to take control over image-based lighting - so you can edit and fully control the HDRI lighting results? Then the answer would be to add HDR Light Studio software to your workflow.
HDR Light Studio is the only dedicated application designed for creating and editing HDRI lighting. Via the live plug-ins, you can edit and create HDRI lighting and see the results in real-time in your 3D software. HDR Light Studio takes HDRI lighting to the next level! You can try it for free today at our website.
This entry was posted in Lighting Demos, Tutorials and Tips.


