Blender Lighting Tutorial 01: Lighting the Bottle
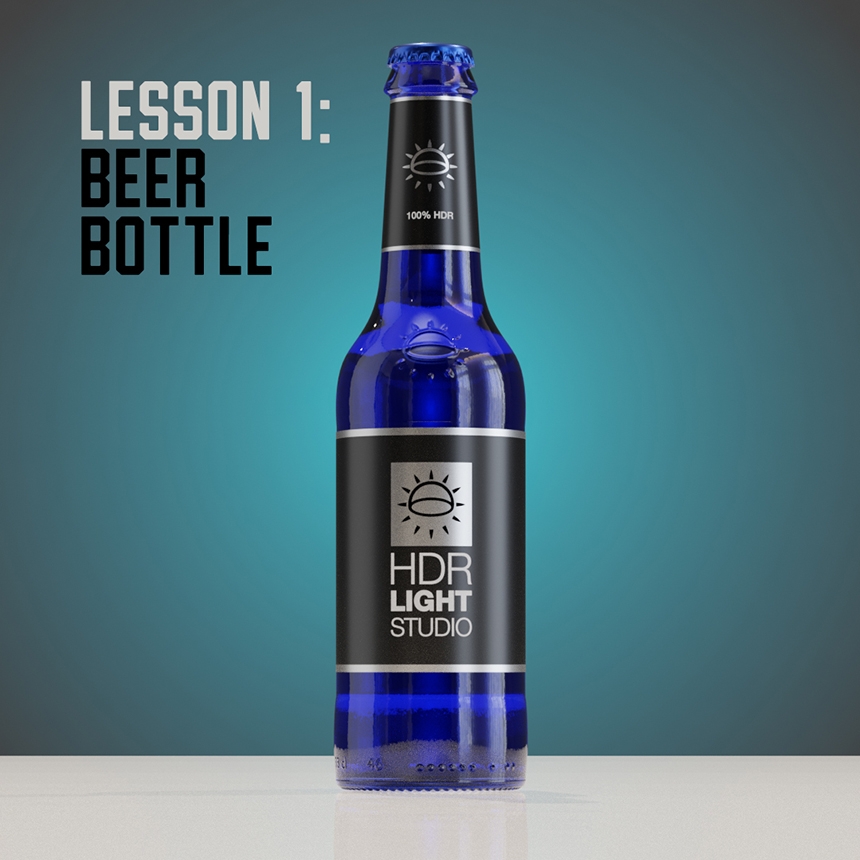
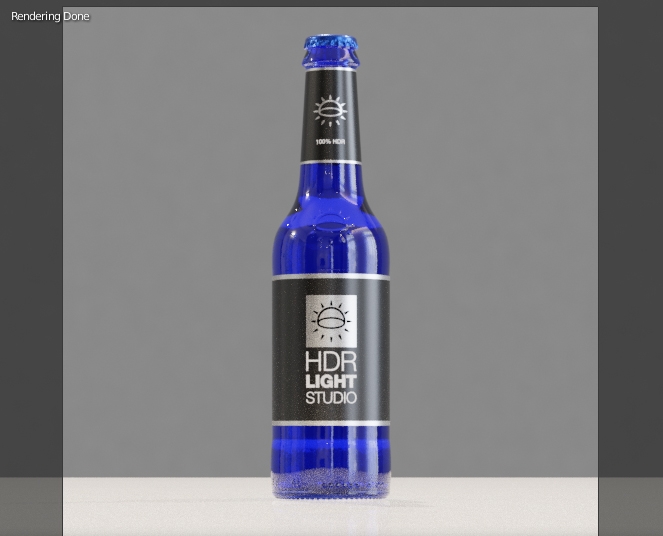
This tutorial will teach a Blender user how to light the HDR Light Studio 'Beer Bottle'. At the end of the tutorial you will have created the image above.
This tutorial is aimed at absolute beginners and is the first in a series of tutorials that will teach you how to light using HDR Light Studio with Blender.
To follow this tutorial you require at least Blender 2.83 on Windows, Mac or Linux. You need HDR Light Studio - Xenon Drop 1 (or higher) installed, including the Presets. Plus the HDR Light Studio 'Blender Add-on' installed and active in Blender.
You can download the Blender scene file here so you can follow along.
(Bottle model kindly provided by Brendan McCaffrey)
Here is a video tutorial or you can follow along with the tutorial document below.
LET'S GET STARTED
Open the scene file 'HDRLS Beer Bottle - Start.blend' and start Cycles interactive rendering.

I like to use the default Shading layout in Blender which shows the interactive render centred at the top of the display.
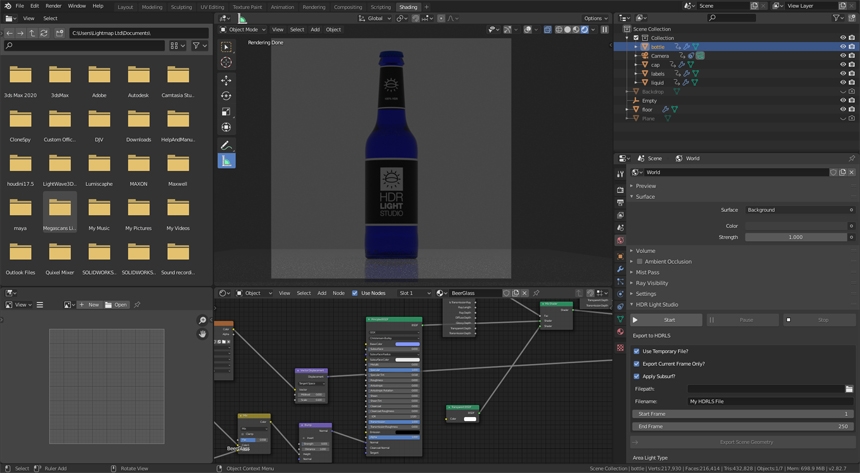
STARTING HDR LIGHT STUDIO
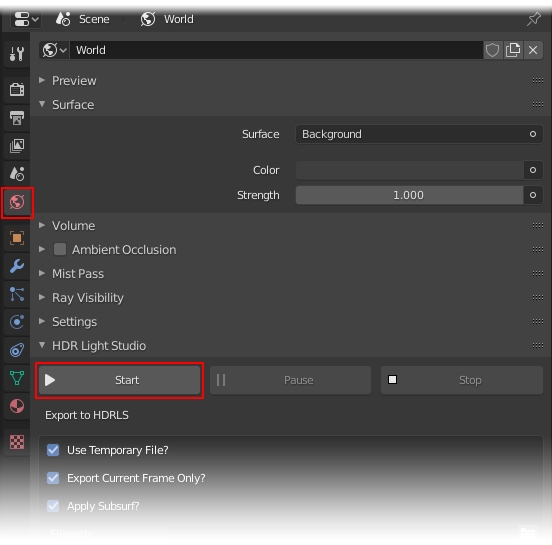
Switch to the World Properties and expand the HDR Light Studio section.
Press the 'Start' button to launch HDR Light Studio connected with Blender.
ARRANGING THE USER INTERFACE
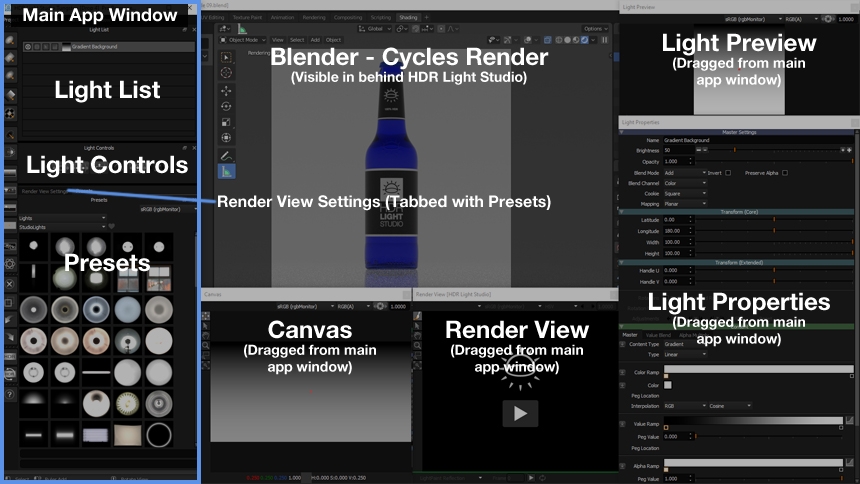
If you have 2 displays, place the HDR Light Studio interface on one, and Blender on the other. This is ideal and you can use the default interface layout for HDR Light Studio too.

However if you have a single display we can arrange the HDR Light Studio interface around the render in Blender.
At this stage you will not know what each interface panel is for, but it will be easier to explain their functions during the lighting tutorial. So for now, please just copy the interface arrangement below. It may take a little time, but you will save your layout and will only need to do this once.
Please note: You can drag a panel from the main HDR Light Studio interface by dragging on the panel name. If panels are tabbed, dragging the tab doesn't work.
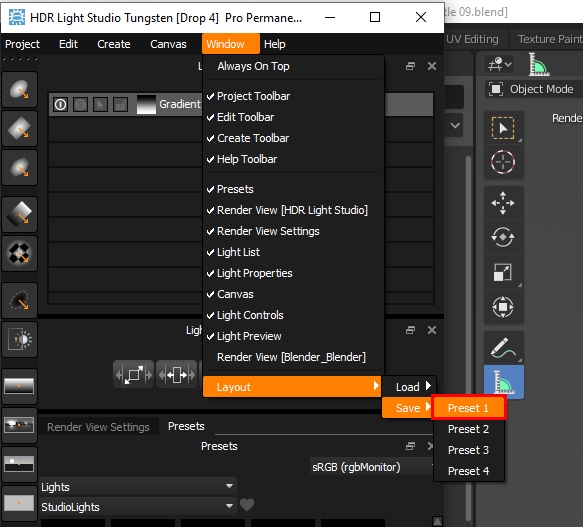
To save your interface layout, go to the menu... Window > Layout > Save > Preset 1
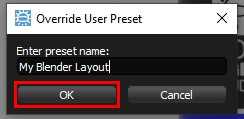
Name the layout - lets call it 'My Blender Layout' and press OK
To stop the HDR Light Studio interface always covering your other software, you can use the menu 'Window > Always On Top' and make sure this setting is not enabled.

STARTING THE LIGHTING PROCESS
The Light List panel lists all of the lights in the current lighting design. You can think of each light as an image layer, like you see in photo editing software. A light at the top of the list is layered over the lights beneath. By default in a new lighting design, there is a Gradient Background light, so you can see your 3D model.
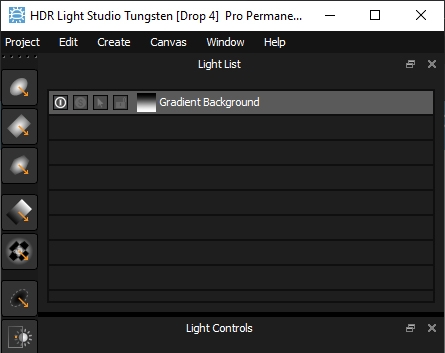
We are going to add one of the preset HDRI maps as the base to our lighting design. We will find this in the Presets panel.
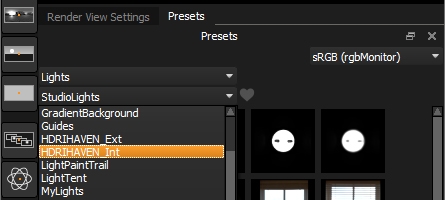
By default the Presets panel will show Preset 'Lights', filtered by the 'StudioLights' tag.
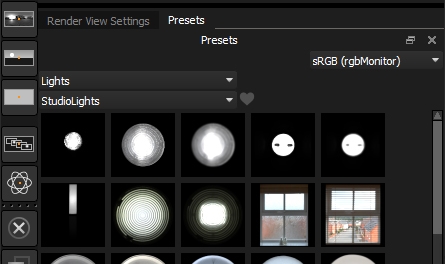
To display the HDRI maps, use the tags drop down and select HDRIHAVEN_Int, to show a selection of interior HDRI maps from HDRIHaven web site. We have saved these as ready to use lights.
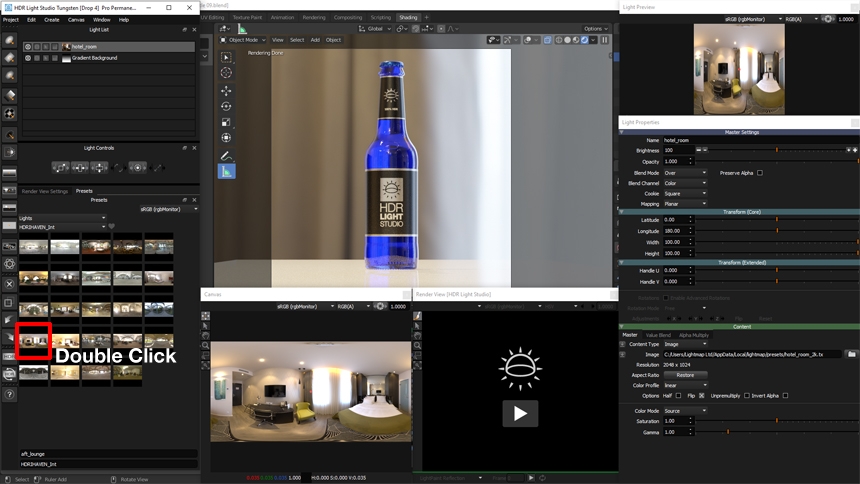
Double click on the hotel_room preset thumbnail, and the preset light is added to the lighting design.
The new light is listed at the top of the light list and is selected, the HDRI can be seen on the Canvas, and the HDRI map is lighting the Blender render. The Light Preview panel shows a flat view of the selected light. The settings for this selected light are shown on the Light Properties panel.
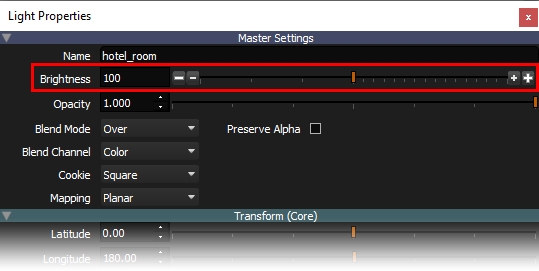
The brightness of the light is adjusted using the slider or the plus and minus buttons. The large plus and minus buttons increase and decrease the brightness by 1 f-stop, basically doubling or halving the brightness.
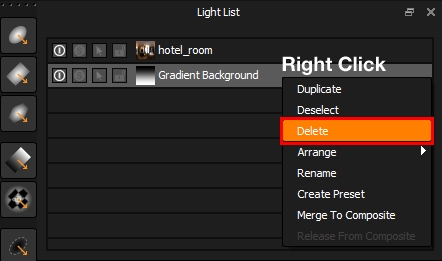
The blend mode for this light is Over, which means it's solid and covers up what is beneath. So let's now delete the Gradient Background light which is not needed, by right clicking on the light in the Light List and choosing Delete from the menu.
Back to the HDRI light
The mapping of this content is Planar, basically it's applied flat onto the canvas. This mapping is ideal for adding HDRI maps. To rotate the HDRI map horizontally we need to adjust the Longitude slider. Even though the image is mapped flat it will still map over the vertical seam on the edges of the canvas correctly.
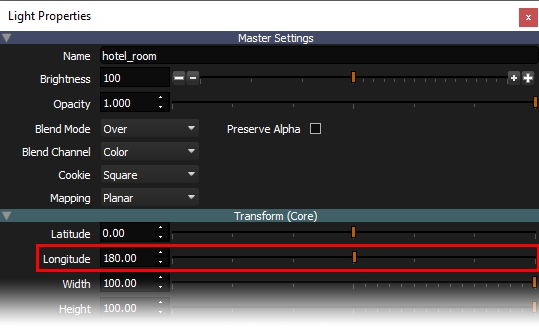
Let's rotate it until we get a nice lighting effect in the bottle. I get a nice effect at about 105, you can also type that value into the field instead of using the slider.
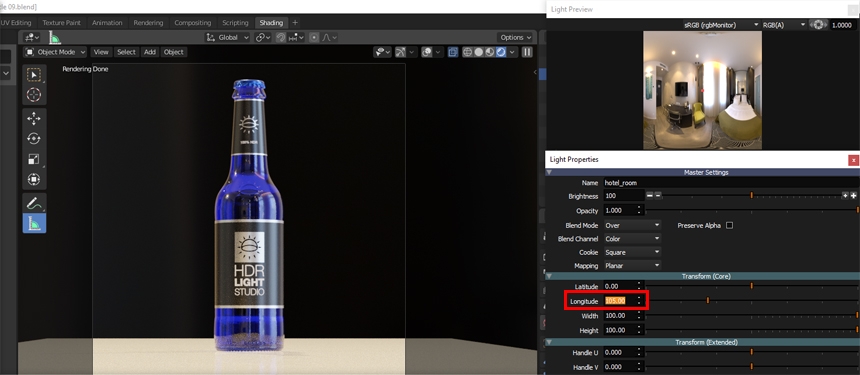
We want to take more control over the background seen behind the bottle, and make it look more like a studio shot. Let's pick another Preset light to do this.
Use the Tags dropdown and select Backdrop.
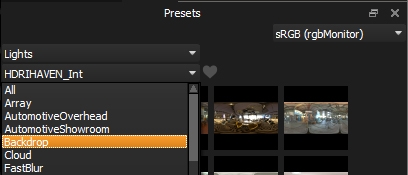
Double click on the first thumbnail - Backdrop 01
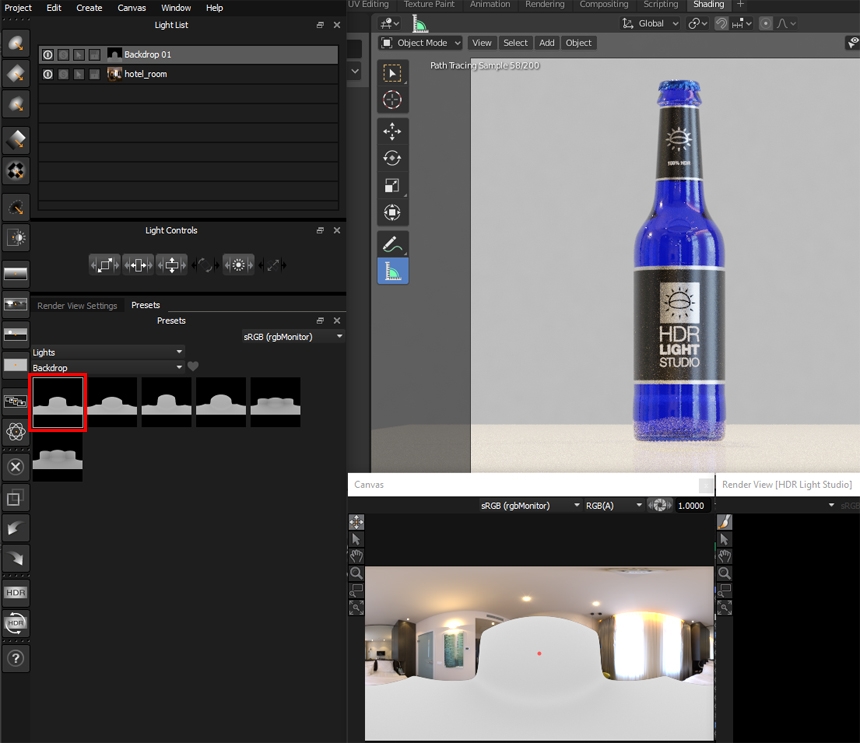
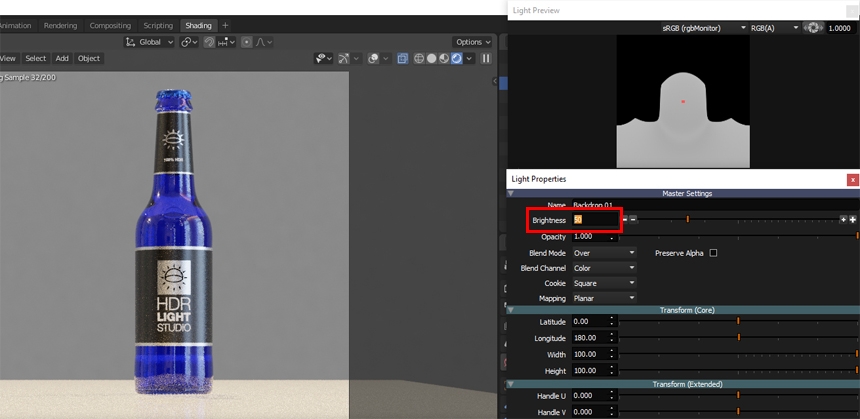
This light is an image of a grey background scoop, like a curved piece of card that is used in studio photography. It has blend mode set to Over and therefore covers the HDRI map, but it also has an alpha channel in the image, so some areas are transparent so the HDRI map beneath can be seen in many areas by the bottle.
Let's turn down the brightness of this backdrop light, to about 50. So the background of the shot is not too bright.
We can turn this light on and off in the light list using the on/off button. This will clearly show the before and after effect of the backdrop.
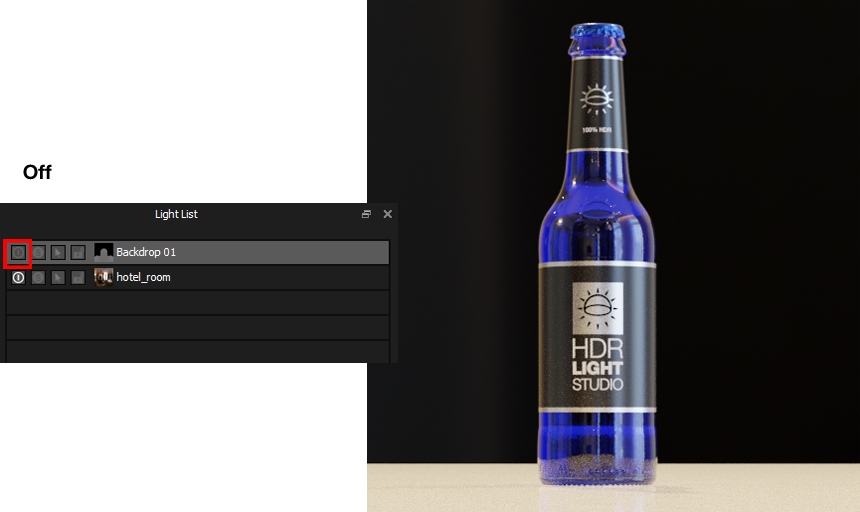
You can see that the bottle looks nicer with the backdrop showing.
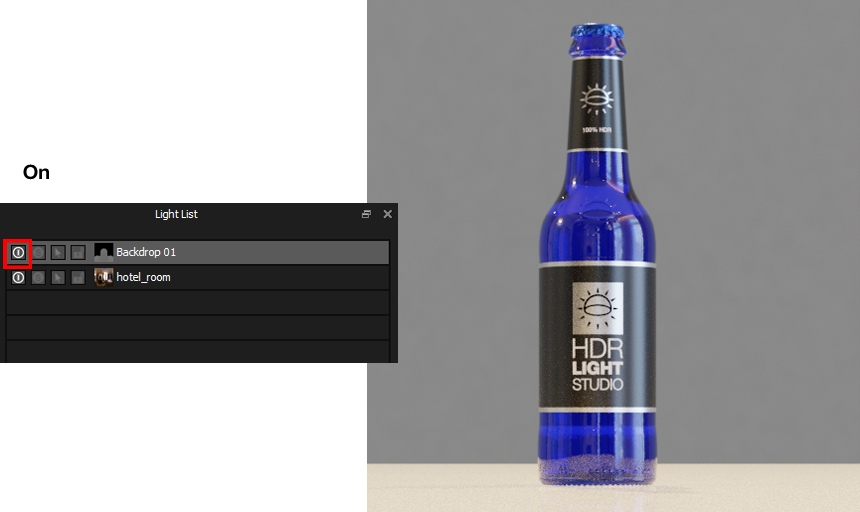
At the moment, you can see that the floor looks cream colored. This is because the lighting from the HDRI map is quite saturated and colored. Let's reduce the saturation of the HDRI map.
Select the hotel room light in the Light List.
In the Content section of the Light Properties, reduce the saturation value to 0.5
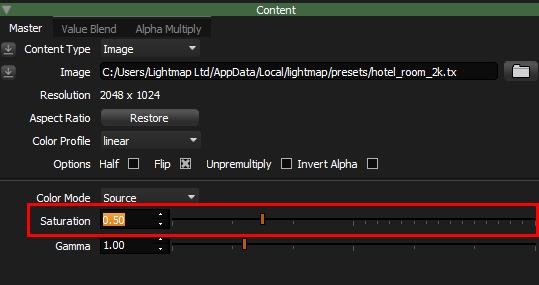
You can now see the floor looks whiter. We have removed the distracting amount of color. The appearance of lights is controlled by the content settings and these settings change depending on the type of content.
I think we should also reduce the brightness for the hotel room light down to 50, as it was a little too bright and washing out the render too much on the right side of the bottle.
We now have a nice base to our lighting design.

Next we should add some light sources - carefully positioned to improve the lighting even more.
To do this, we will now use HDR Light Studio's internal render view, to allow us to precisely position lights using the LightPaint feature.
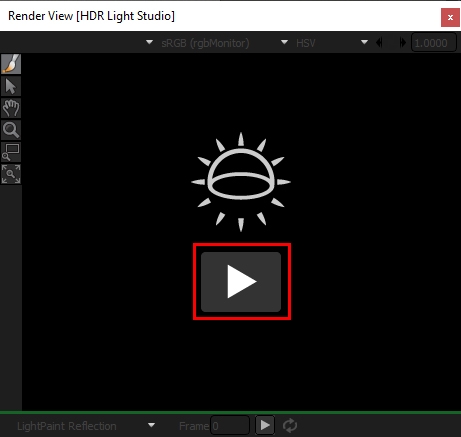
Press the play button to import the Blender scene into this panel.
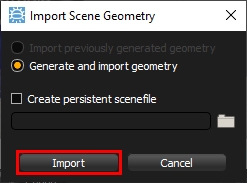
Press the import button and the scene will be exported from Blender as a temporary alembic file just for this lighting session, and loaded into this panel.
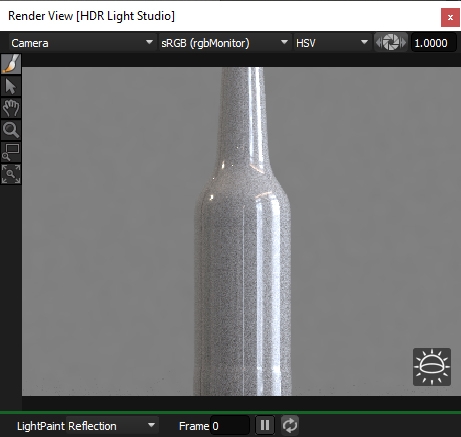
This views purpose is to provide an interface for positioning lights on the model, whilst giving some visual feedback to help with this process.
A simple shader with a diffuse color and reflection is applied to the whole model.
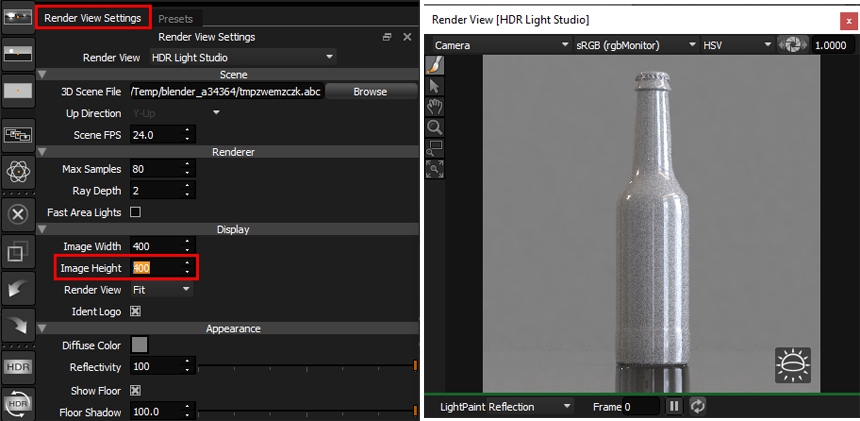
At the moment the bottle is not fitting in the view.
Go to the Render View settings panel to adjust setting for this view. Change the image height to 400 pixels too, so that we match the square image in blender and fit the bottle into the render view.
We could select the Diffuse Color swatch and change the color of the shader to a blue, to give a match of sorts to the Blender view.
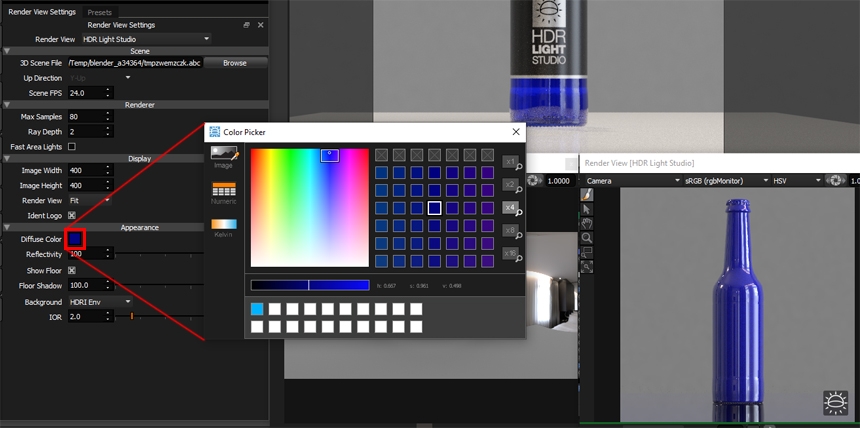
Close the color picker once you are happy with the color.
Now we are finished with the Render View Settings, select the Presets tab to bring it to the front ready to use again later if needed.
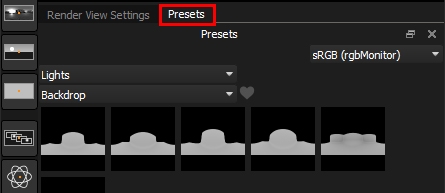
Let's add a light to bring the embossed logo on the bottle to life.
Click once on the Round Light on the tool bar.
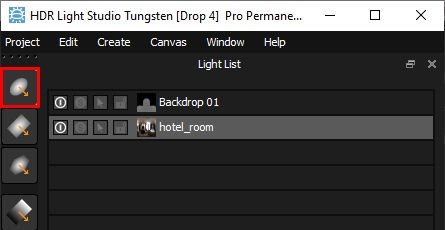
A soft round light is added to the center of the canvas, which is behind the bottle.
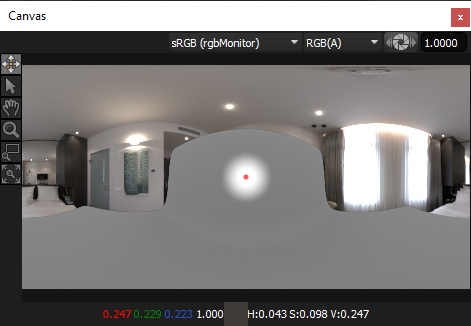
Click on the area of the bottle in the render view, where we want the effect of this new light.
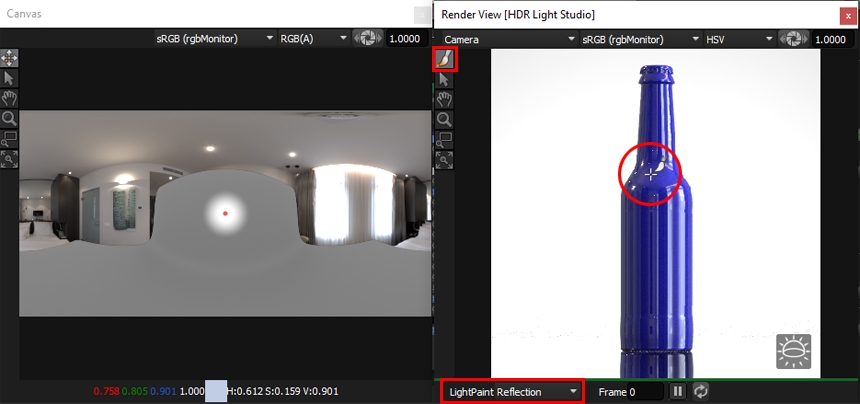
The light is then moved to reflect in that location. This is because the LightPaint mode by default is set to Reflection in this view.
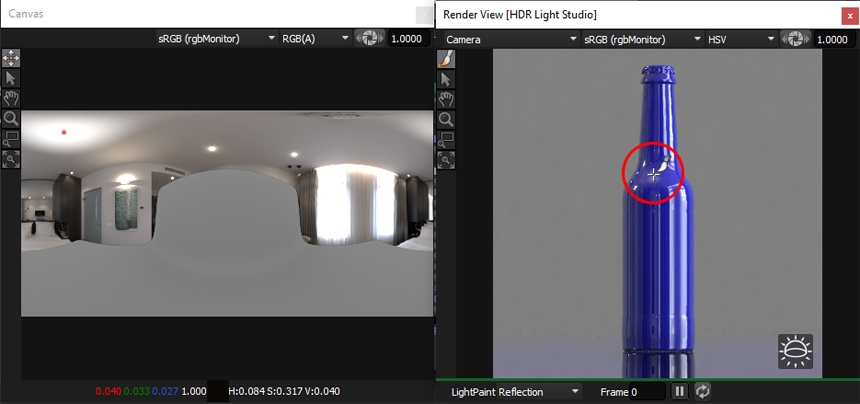
The light needs to be brighter, let's press the + button until it's bright enough. 2 f-stops is enough, making the light's brightness 400.

To isolate the effect of this light, lets solo it. Click on the S button next to the light on the light list.
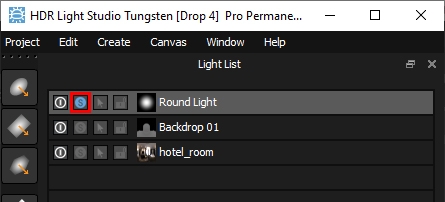
We can see that the light is creating a nice highlight around the embossed area, so we can more clearly see the logo.
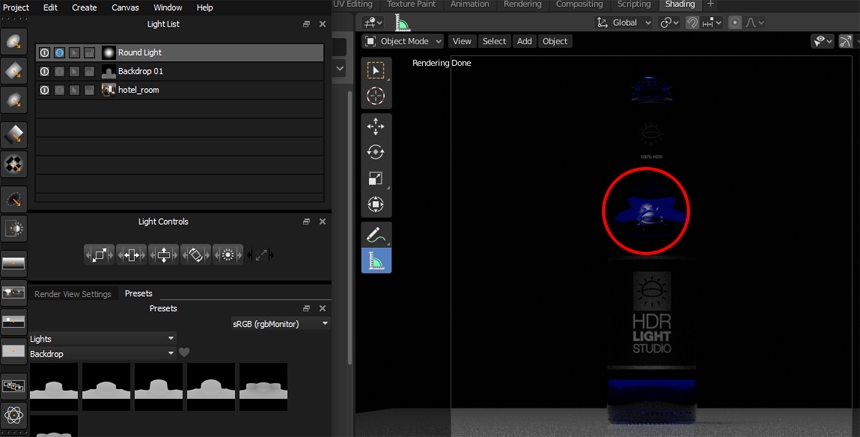
If this is not positioned correctly, you can adjust the position by either making small adjustments on the canvas by dragging its position. Or click / drag on the 3D model again in the Render View.
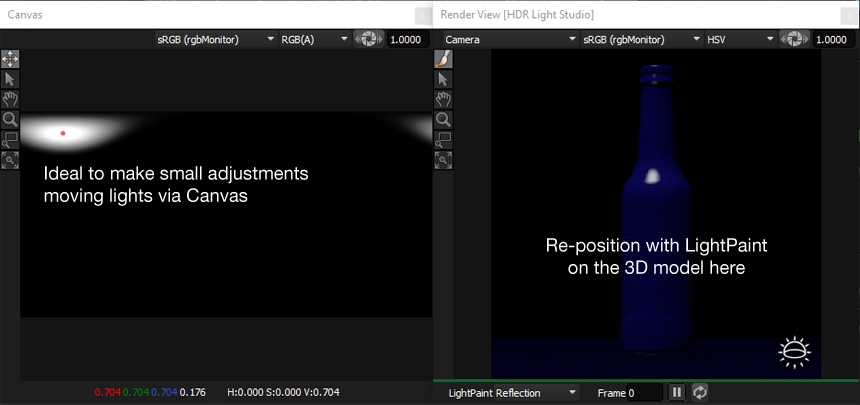
If you prefer a previous position, you can use the menu Edit > Undo in HDR Light Studio or use CTRL + Z.
Once you have the perfect position. Unsolo the light pressing the S button again, so all lights are shown again.
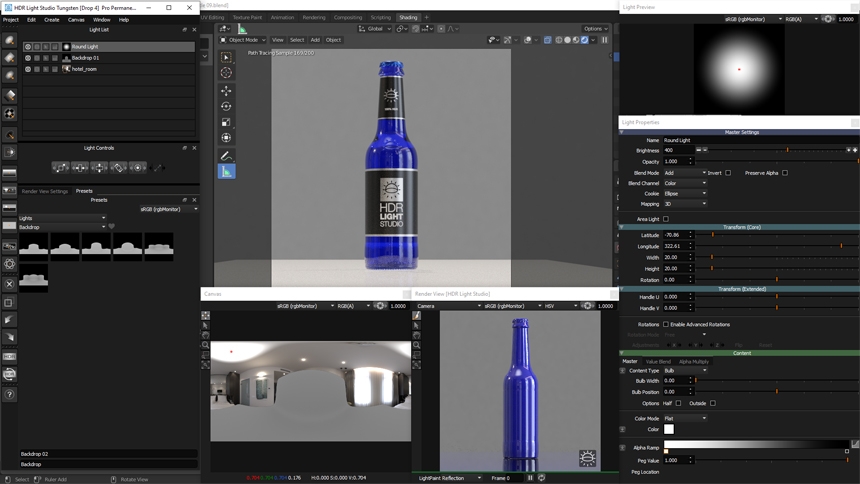
You can use LightPaint to position lights behind the 3D model. We call this positioning method Rim.
Add another Round Light from the tool bar.
By default it will appear centred on the canvas.
Lets change it size in the properties panel. Making the Width and Height a value of 3.
Solo this light.

You can see the light is towards the bottom of the bottle and behind it. It's on the HDRI map that is visible behind the 3d model.
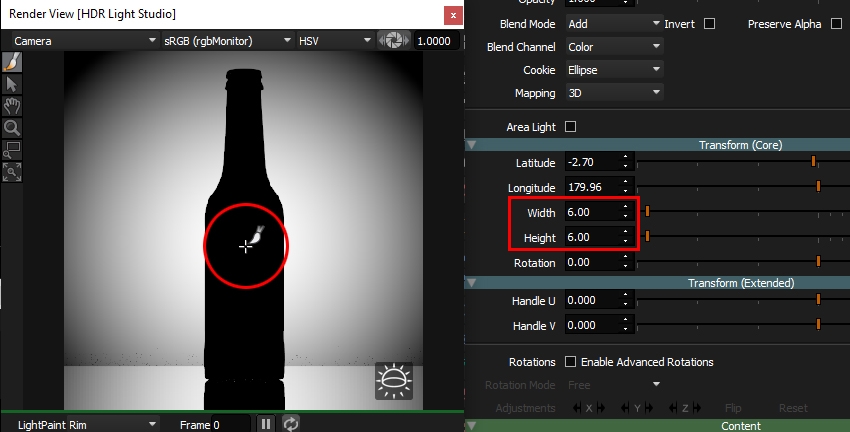
Change the LightPaint mode on the Render View to Rim using the drop down.
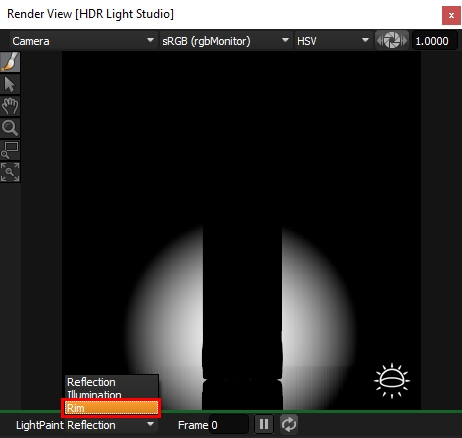
Click and drag in the render view, you can see the light is moving to be positioned on the HDRI map to be under your cursor, behind the 3D model. Let's position the light by releasing the mouse around the center of the bottle. Let make this light bigger to fill the view, say Width and Height 6 x 6.
Also lets change its color to a cyan, which will make for an interesting background.
Click on the color swatch on the Light Properties 'Content' section, and choose a cyan color from the color picker.
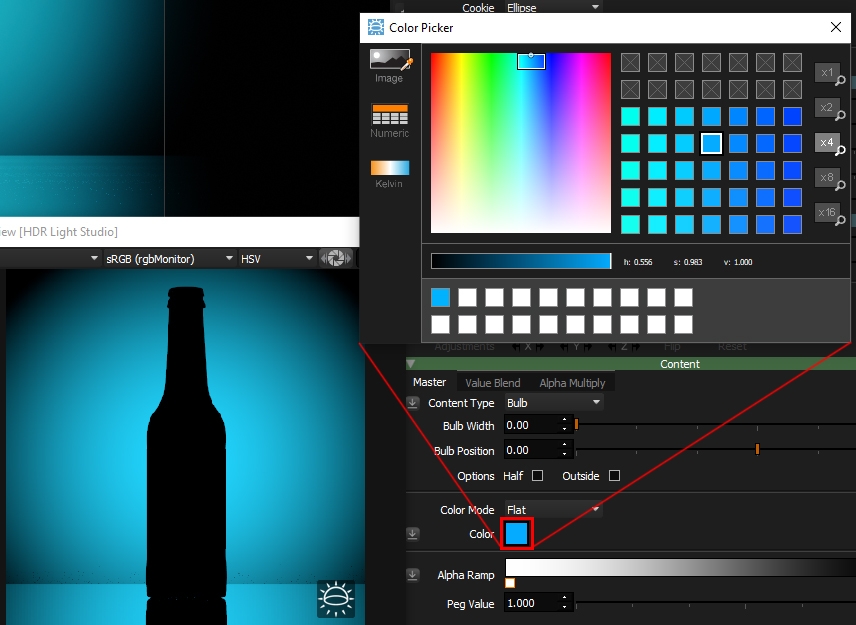
If we unsolo the light, we can't see the effect of this rim light very well, so lets turn down the brightness of the backdrop light to 10. Now the rim light is more effective.
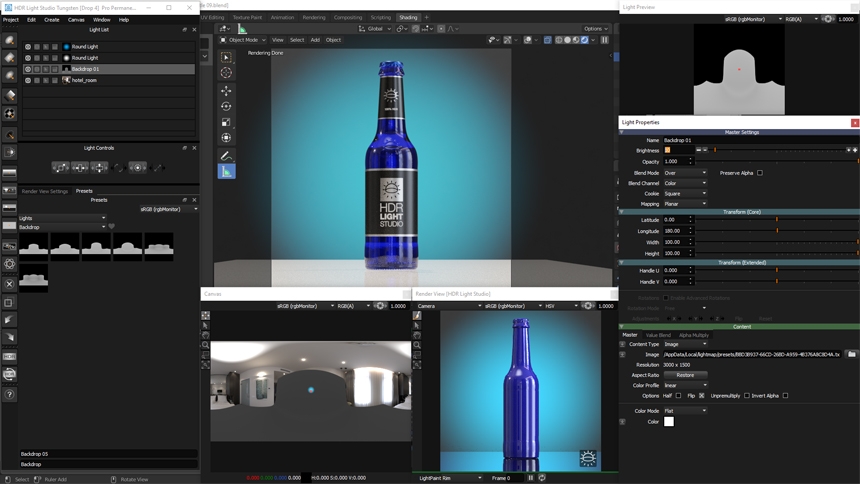
Before continuing, lets change the lightpaint mode on the view back to reflection, the most useful mode.

We have 2 lights in the light list with the same name. One light was to highlight the embossed logo, and one was to rim light the bottle. Lets rename them to make it easier to know what they are doing.
Double click the top Round Light, and call it Rim Light and press OK.
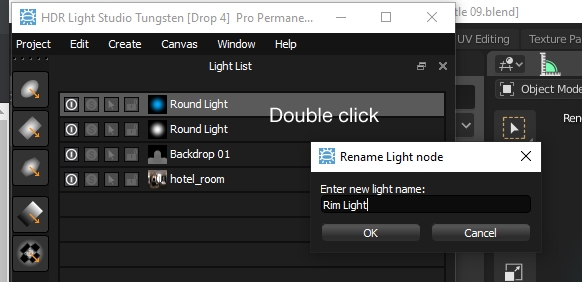
Double click the other Round Light and call it Logo Light and press OK.
It makes sense to keep your lighting design well organised.
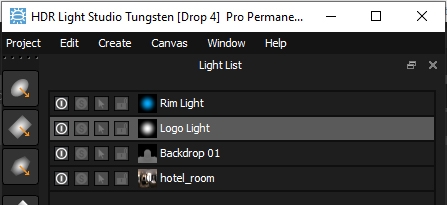
Now let's add a light to the left of the bottle.
Let's select SoftBox in the tags drop down in the Presets panel.
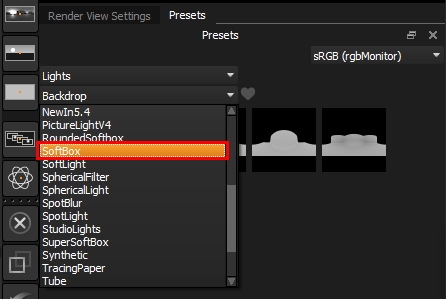
Drag and drop Softbox 72x175 onto the left side of the bottle on the render view.
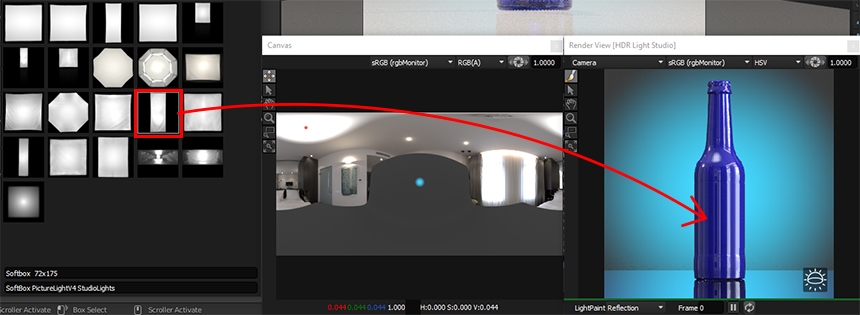
It will be positioned to reflect in the location where it was dropped.
Let's use the light control proportional scale button, to click and hold and drag the light to a larger size.

When we release the mouse, the size is updated. A size of around 55 x 55 looks good.
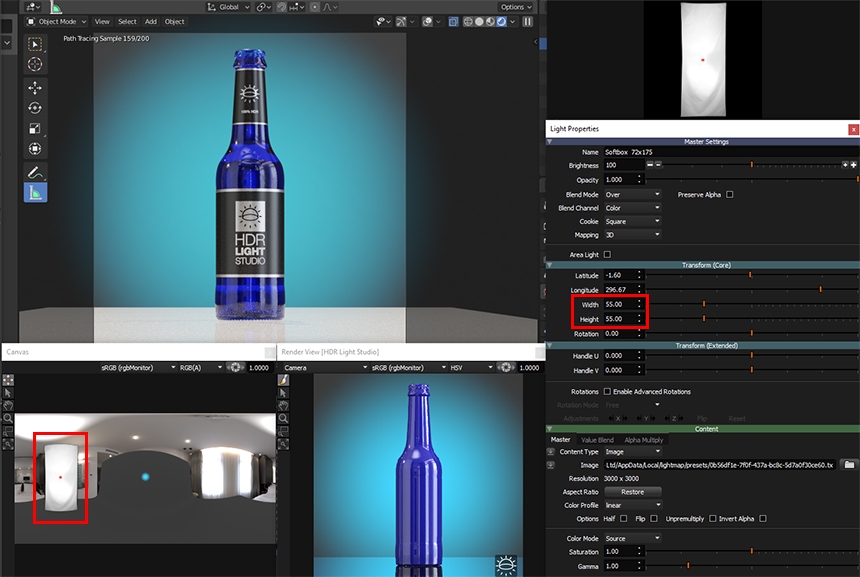
Again you can reposition the light on the canvas, ideal for small adjustments, or clicking on the render view. Let's solo the light to make it clearer to see what we are doing.
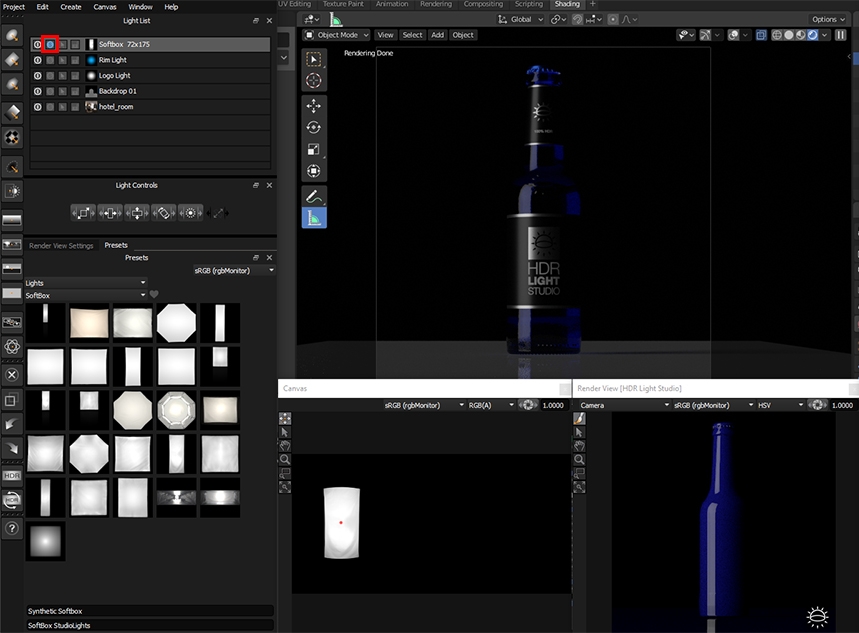
OK, that looks good, let's unsolo the light to see all the lights and where the lighting design is at.
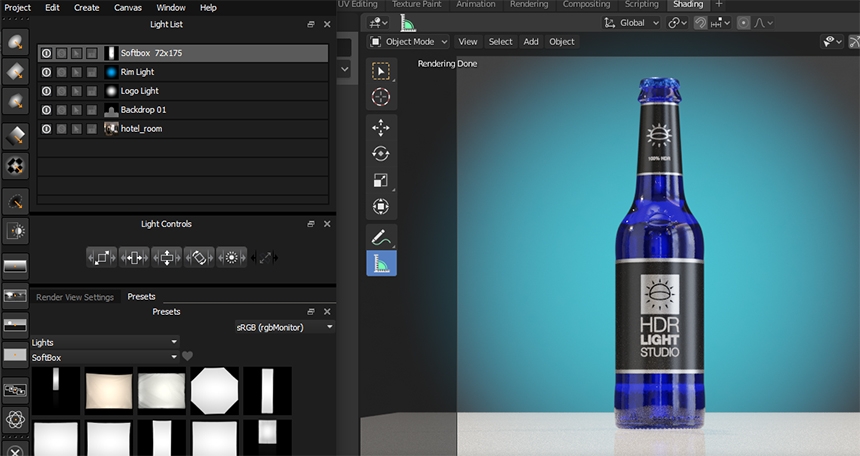
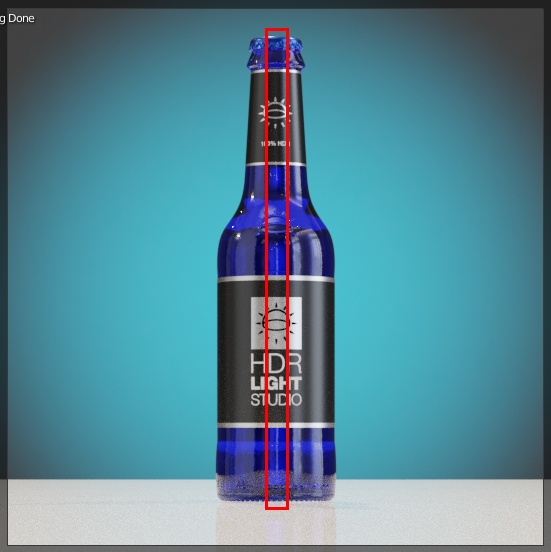
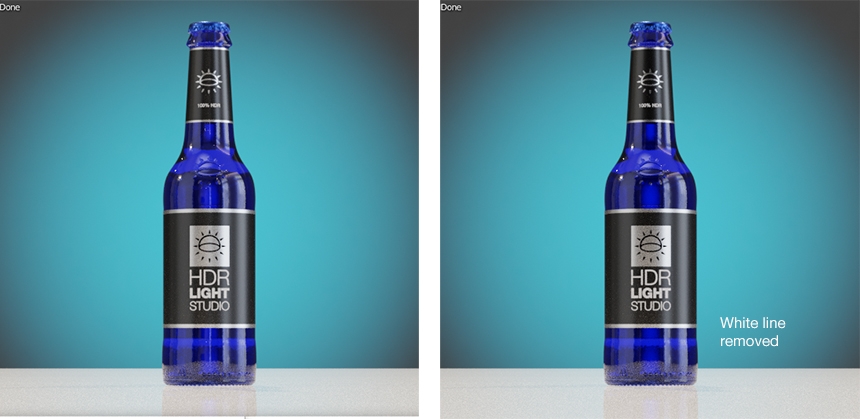
That looks pretty good. However, there is a strange thin line in the front of the bottle, coming from the HDRI map base.
Let's get rid of this problematic reflection to complete the lighting.
Let's duplicate the Softbox light, right click on the light in the list and select Duplicate.
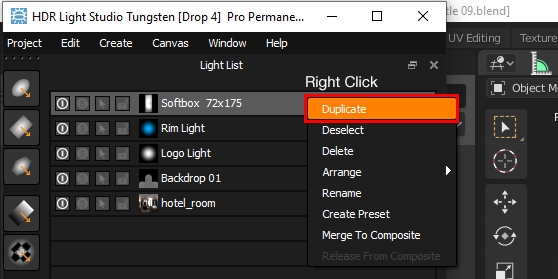
Rename the light to Blocker.
Change the brightness of this light to 0, and it will be black.
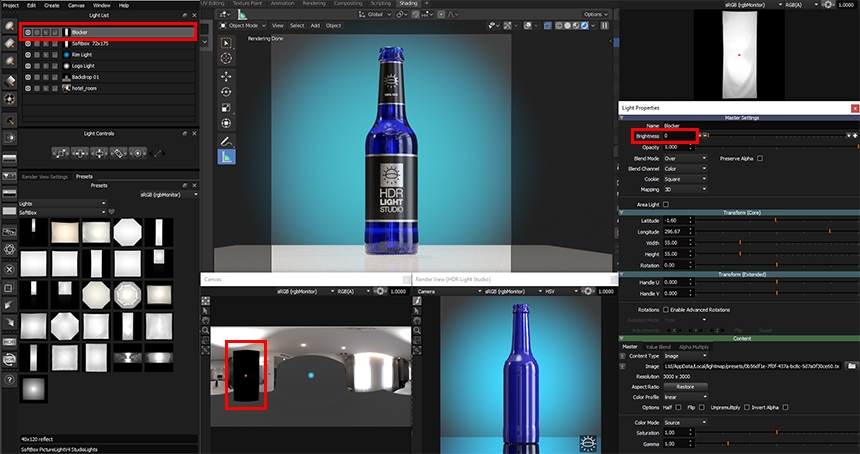
Click on the front of the bottle, this black light now covers the content beneath, including the area of the HDRI map that was causing the thin white line.
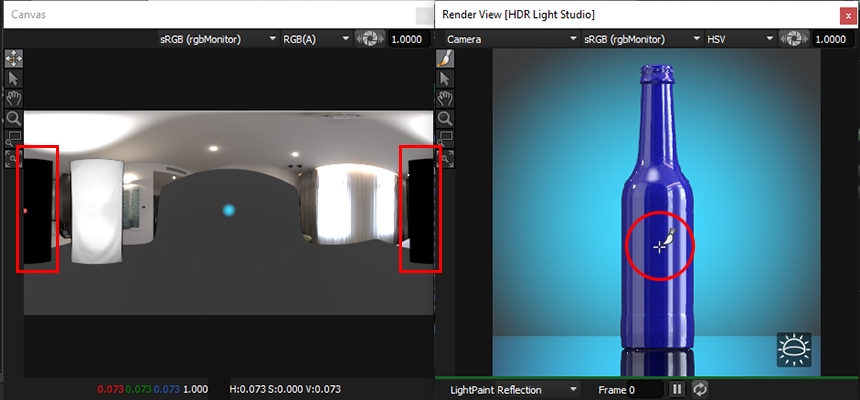
Let's click, hold and drag the Blocker light down the light list to put it under the Backdrop light.
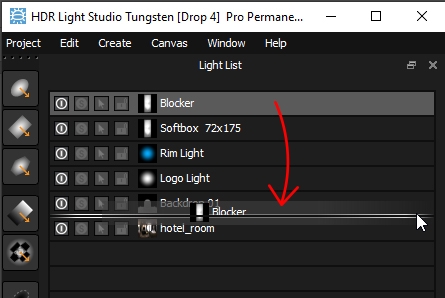
The light now appears beneath the backdrop.
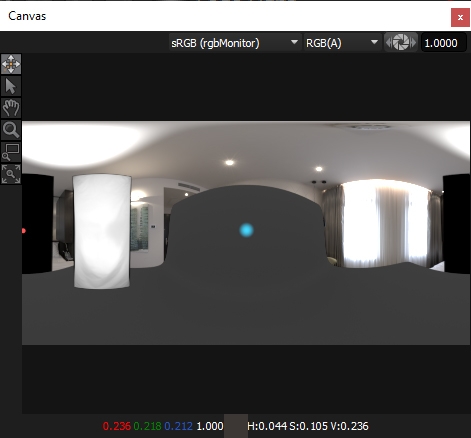
That light fixed the issue, you can turn it on and off to see the difference it is making. It looks much better with this fix.
To finish the lighting process we need to render a high quality HDRI map file on disc for Blender to use. At the moment we have been sharing a low resolution image to keep things nice and fast.
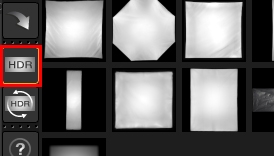
Press the HDR button on the tool bar.
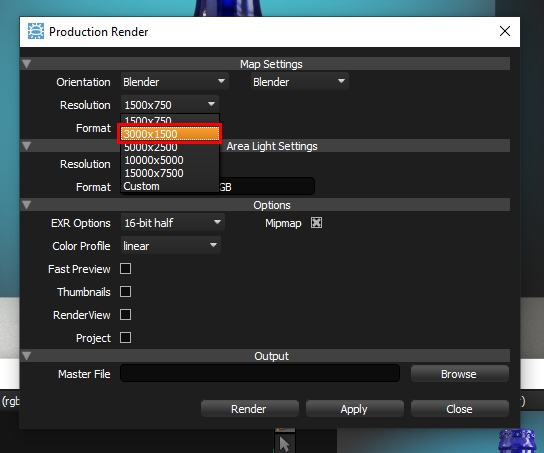
Let's change the resolution of the map to 3000 x 1500 in the Production Render panel.
Press the Browse button to navigate the the folder where you want to save the HDRI map, and give it a file name, we are going to call it 'Bottle Lighting'. Then press Save.
Now press Render.
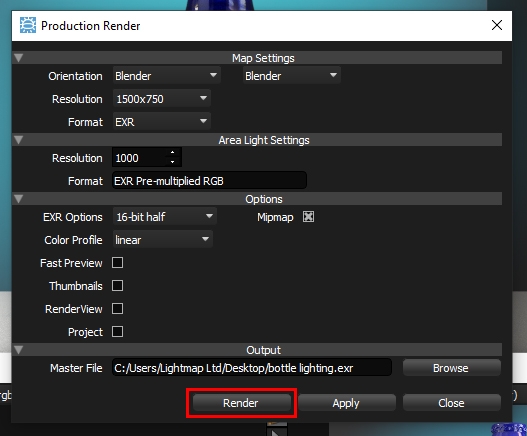
An EXR file will be generated and the add-on will tell Blender to now use this file on disk for the World.
Next we should go to the Blender interface and press the Stop button in the HDR Light Studio controls.
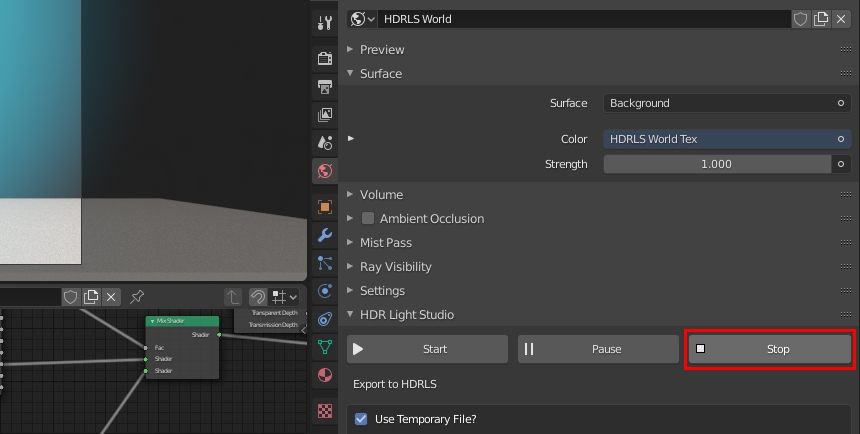
The Blender scene is now lit with a HDRI map generated by HDR Light Studio, and HDR Light Studio has been closed.
We can now render this bottle at a high resolution in Blender to produce the final result. (Pressing F12 will start the render in Blender)
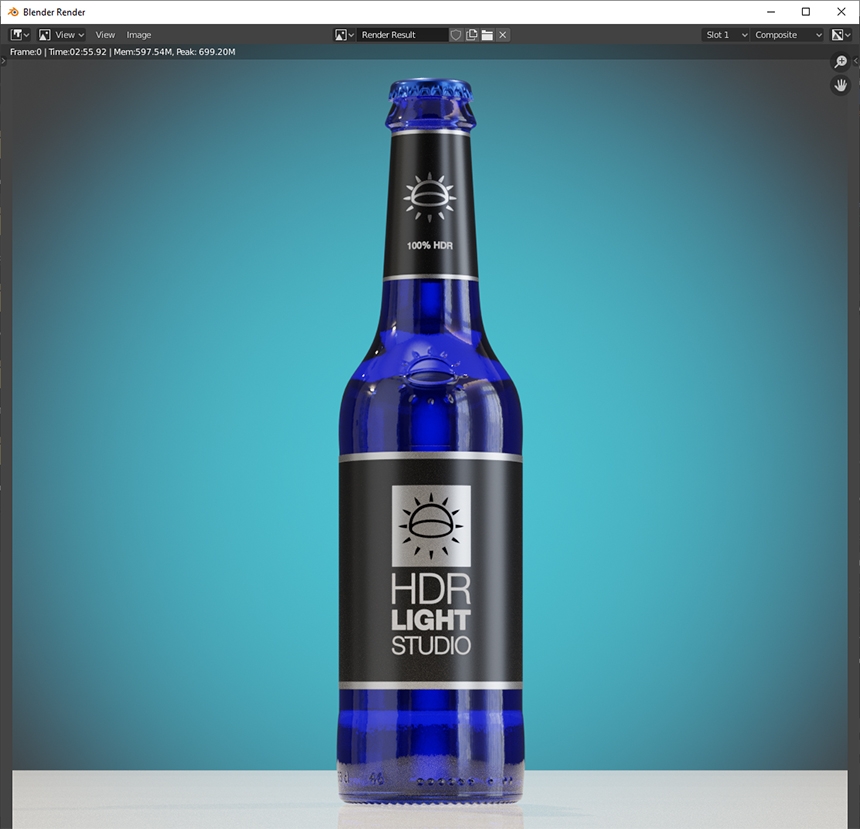
If you want to make changes to the lighting created with HDR Light Studio, this is easy.
Press the Start button again, to start HDR Light Studio connected with Blender.

Your lighting design will actually automatically load because it has been stored inside your Blender scene file. This means you should save your Blender scene file after using HDR Light Studio, to make sure the embedded lighting design is saved.
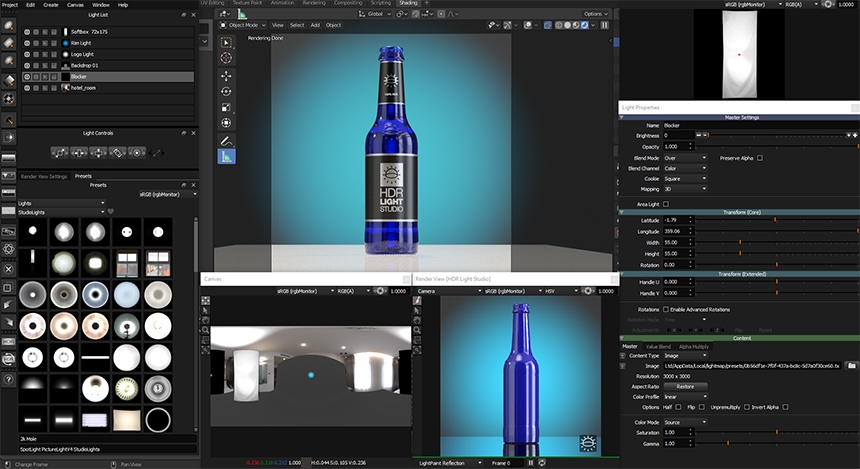
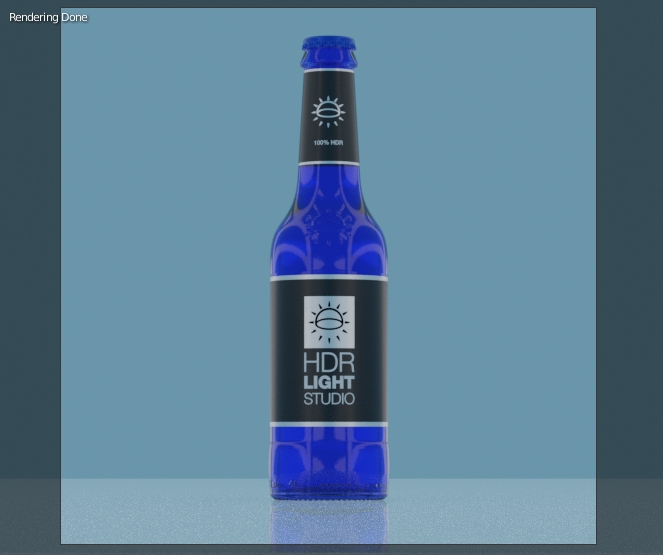
Now that HDR Light Studio is open, then the hi-res HDRI map you created is no longer lighting your scene, the live HDR image is lighting the scene. So after making your lighting adjustments in HDR Light Studio, you will need to render your HDR file again to be used in Blender. If you don't do this and close HDR Light Studio, then a stand-in blue HDRI map logo will be used to light your scene, to make it obvious that Blender is not using a final HDRI map and HDR Light Studio is closed.
We have learned a lot during this tutorial and I think you now have the skills to explore HDR Light Studio some more. You should be able to light one of your existing Blender scenes using HDR Light Studio and the methods shown here.
Happy lighting!
What's Next?
Watch Blender Lighting Tutorial 02: Smart Car Studio Lighting
This entry was posted in Lighting Tutorials and Demos and tagged Blender.

