Mixing the Maps
Feature Focus: Alpha Multiply
Level: Expert
HDR Light Studio Version: 5
Software used: HDR Light Studio (standalone)
In this tutorial we will use HDR Light Studio 5 to combine two HDRI maps, using the floor area of one, and the sky area of another, mixing them with a soft blend at the horizon. We will then add a gradient across the whole map acting as a color filter.
1. Delete the Default Gradient Background light
2. Create a Picture Background and load a HDRI map
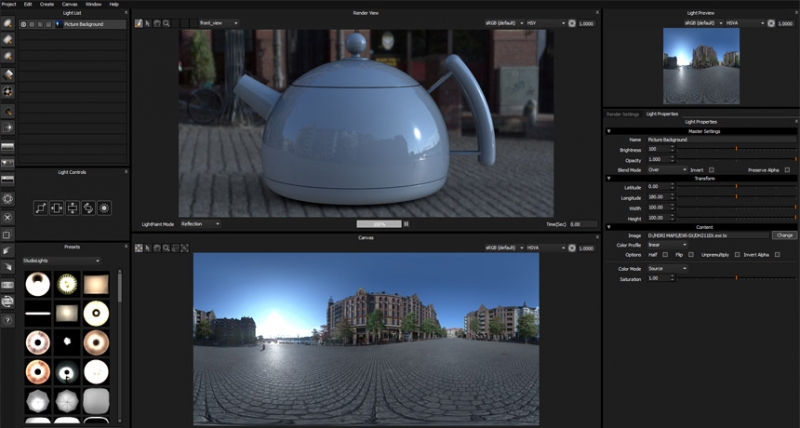
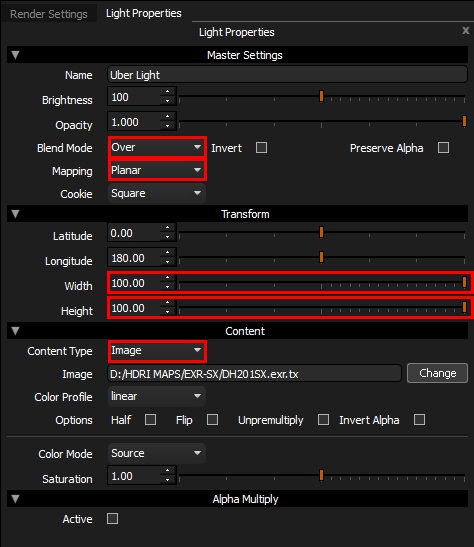
3. Now create an Uber Light and change its settings as follows:
Blend Mode > Over
Mapping > Planar
Width > 100
Height > 100
Content Type > Image
And load a second HDRI map as your content
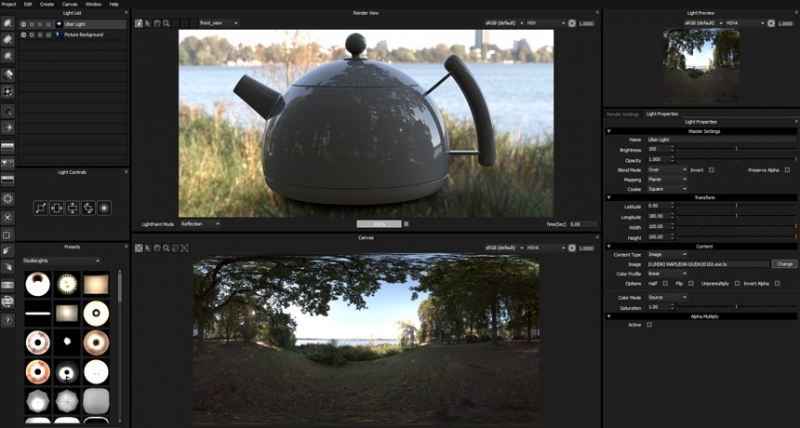
Your second HDRI map will now cover the first, as the Blend Mode is Over.
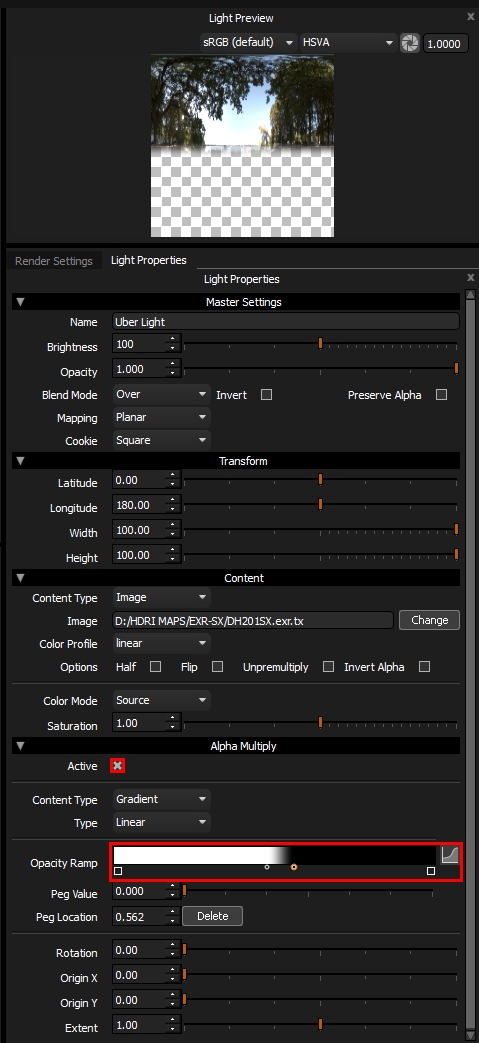
4. Next, we need to make the bottom half of the HDRI map transparent, so we can see the floor area of the first HDRI map.
Make the Alpha Multiply active by enabling the check box.
As the name says, the Alpha Multiply will ‘multiply’ the alpha values already present in the original content of the light (in this case the HDRI map was solid, so the alpha value is 1), by the values from the Alpha Multiply content.
Adjust the Opacity Ramp to be white on the left side, and black on the right side, with a soft transition area in the middle of the ramp. (See settings below)
You can see in the Light Preview image where the bottom half of the HDRI map has become transparent.
HDR Light Studio now shows both HDRI maps merging to create a new HDRI map lighting the shot, with the floor area from the first HDRI map blending into the sky area of the second.
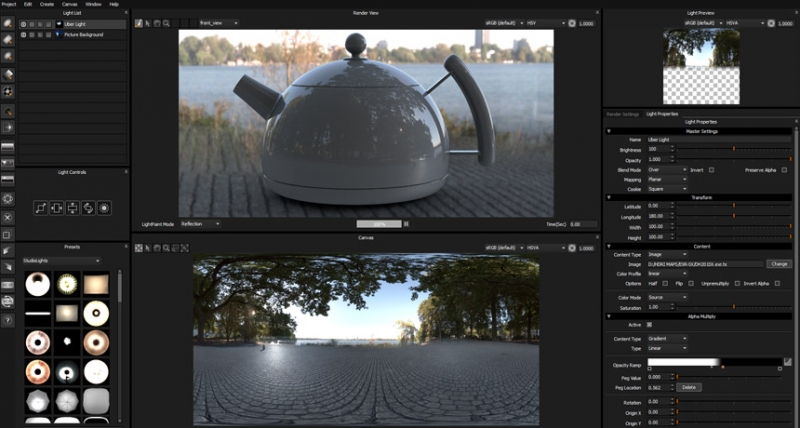
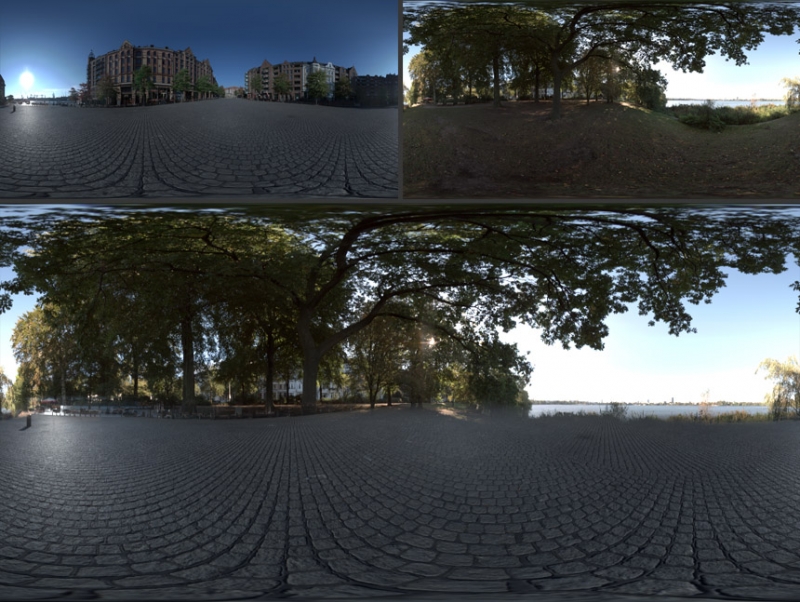
Showing the 2 source HDRI maps and the blended result
You can adjust the Longitude of both lights to create a more pleasing CG lighting effect on your model.
Next we are going to put a color filter across the whole HDRI map – warm to cool.
5. Make an Uber Light
Adjust its settings to:
Mapping > Spherical
Content Type > Gradient
Adjust the Color Ramp to have a be orange on the left and blue on the right.
Adjust the Value Ramp to be solid white (white each end).
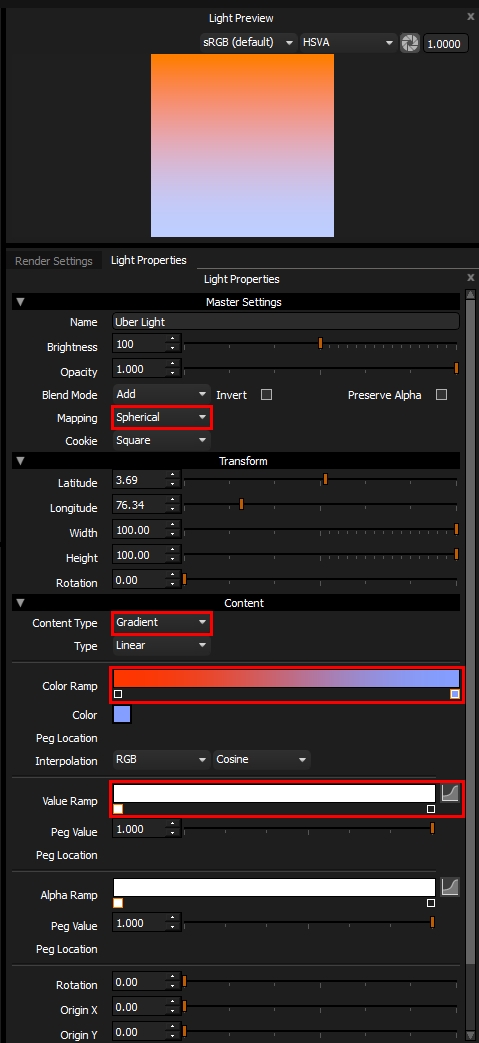
Click on the Canvas to move the start location for the gradient, this will be the orange part of the gradient. You can see the gradient wraps around the whole HDRI map, the blue section is located on the opposite side of the lighting sphere.
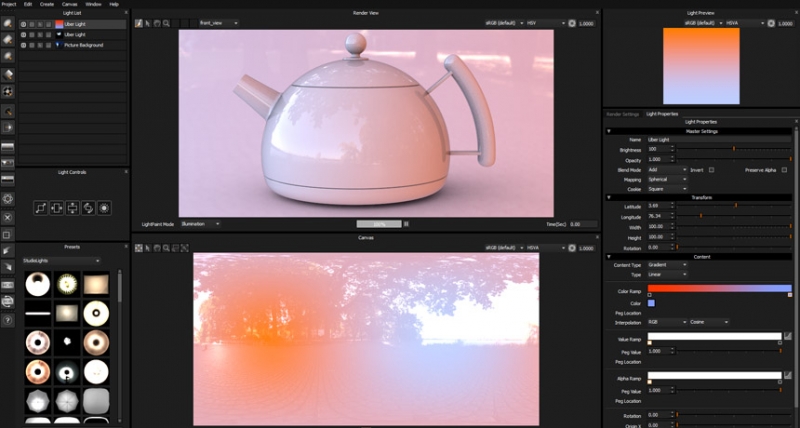
6. Change the blend mode of this Uber Light to Color.
The gradient now colors the HDRI content beneath, and acts as a color filter on your entire HDRI map.
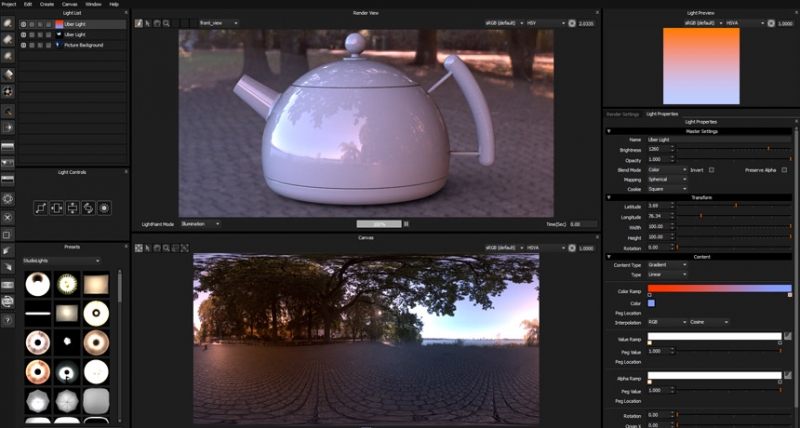
That’s it, you have learned how to use some of the new features in HDR Light Studio 5, to merge two HDRI maps and apply a seamless color filter across the entire canvas. Lighting effects like this were just not possible in HDR Light Studio 4, where only a single HDRI map could be loaded and there were no full canvas lighting effects.
This entry was posted in Lighting Tutorials and Demos and tagged Alpha Multiply.

